User Permissions
Last updated: October 13, 2026
Manage User Permissions in Wisedocs
As your organization grows, it’s crucial to control who can access sensitive information while keeping security and compliance top of mind. Wisedocs’ User Permissions feature puts you in charge of user access, role management, and team configuration.
User Access, Roles, and Teams
Step 1: Click the Teams icon in the left sidebar to open the Users page.
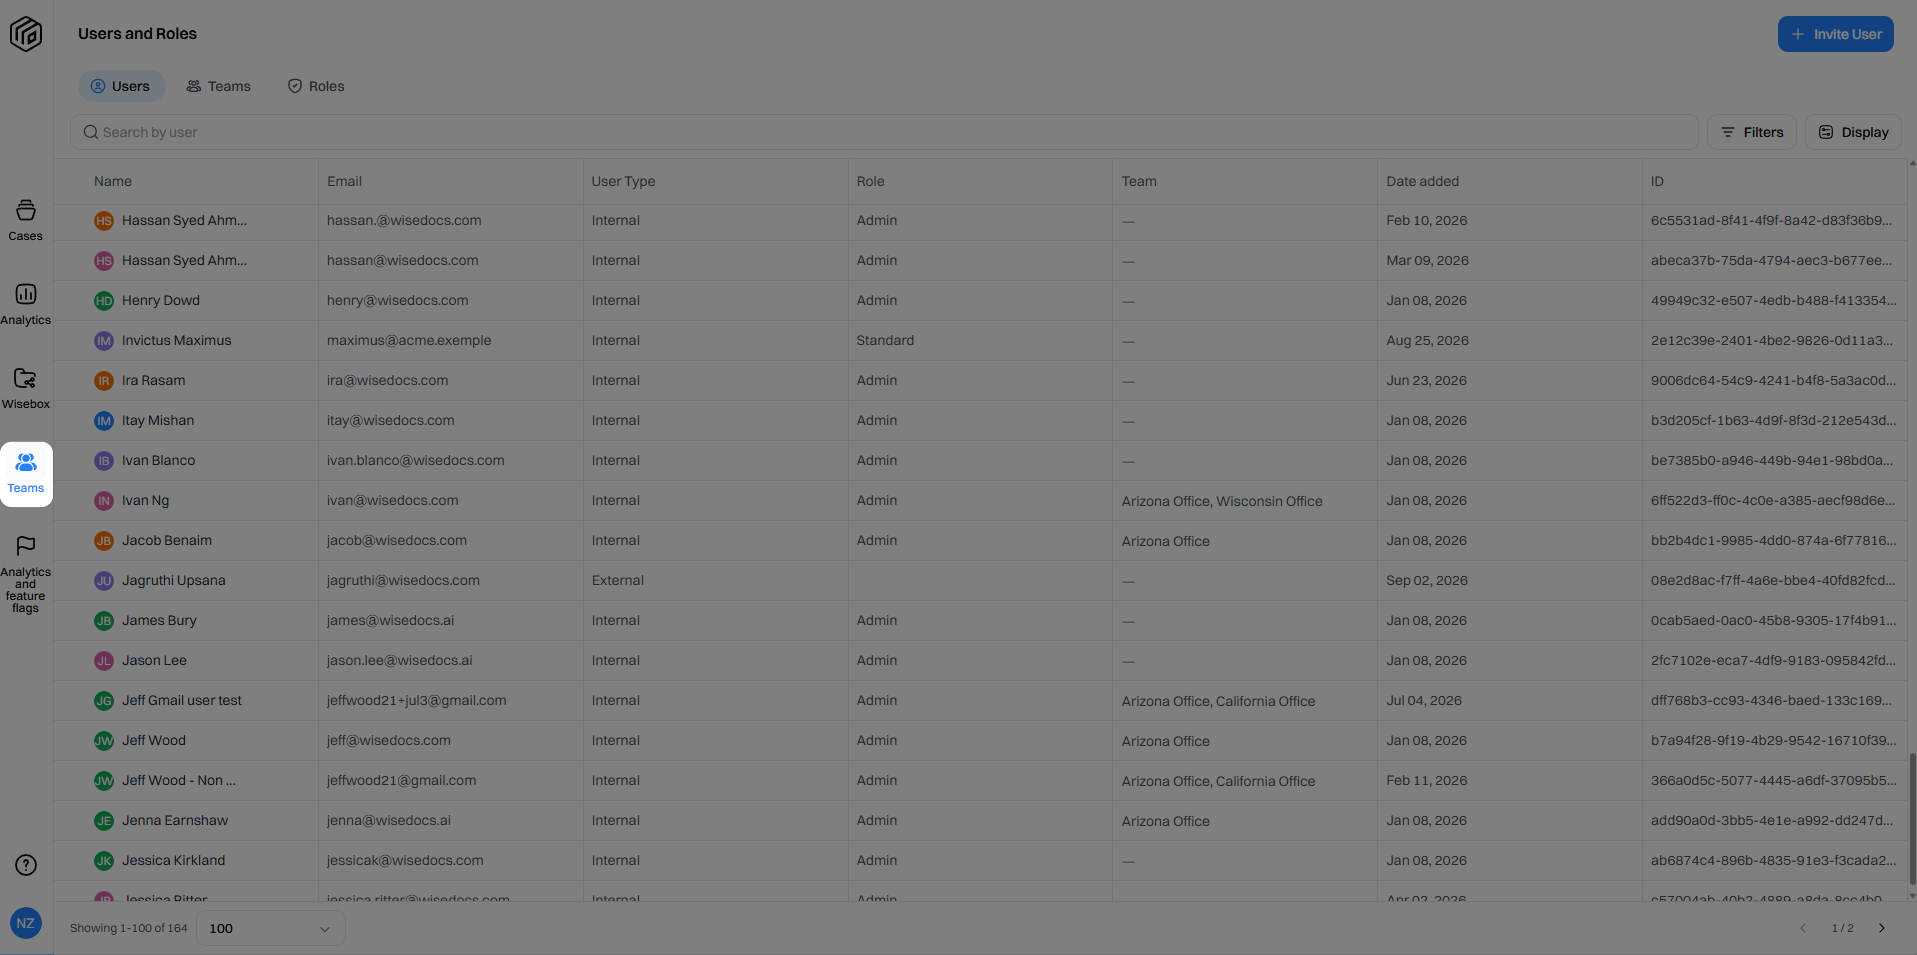
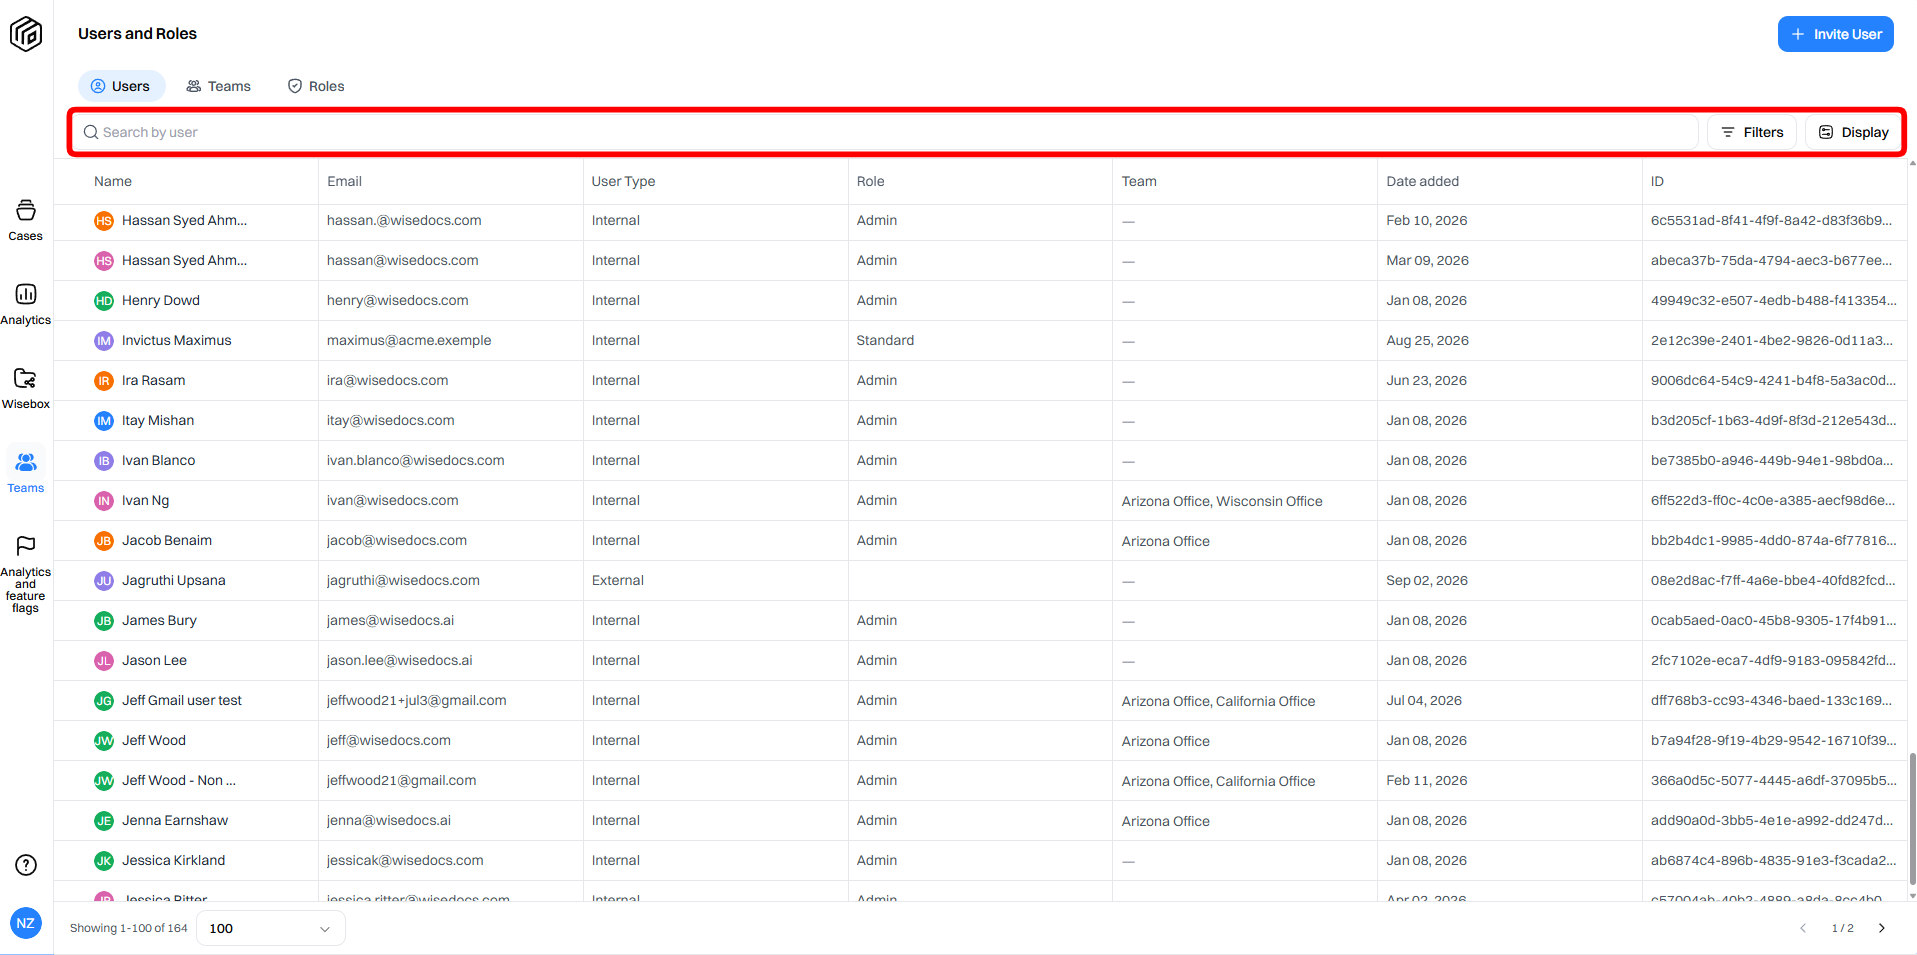
Step 2: Review the list of users. Here, you can search, filter, and customize the display to find or view users by name, email, role, or team.
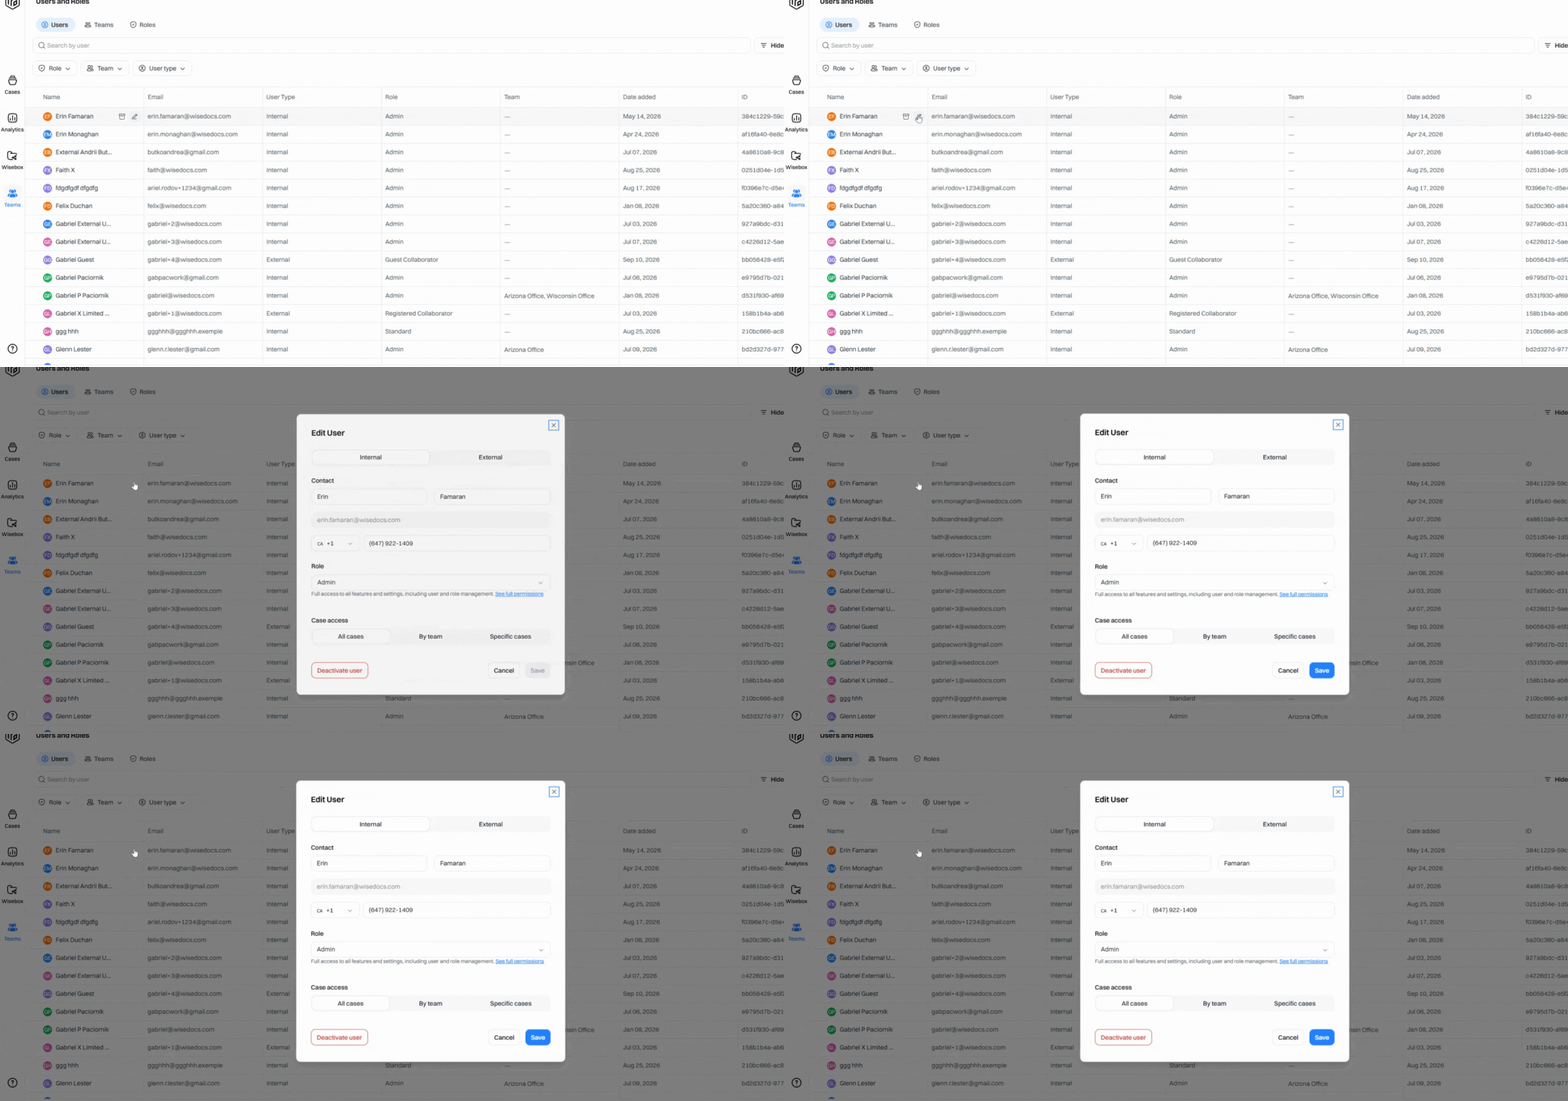
Step 3: To edit user access, click the Edit icon next to the user’s name.
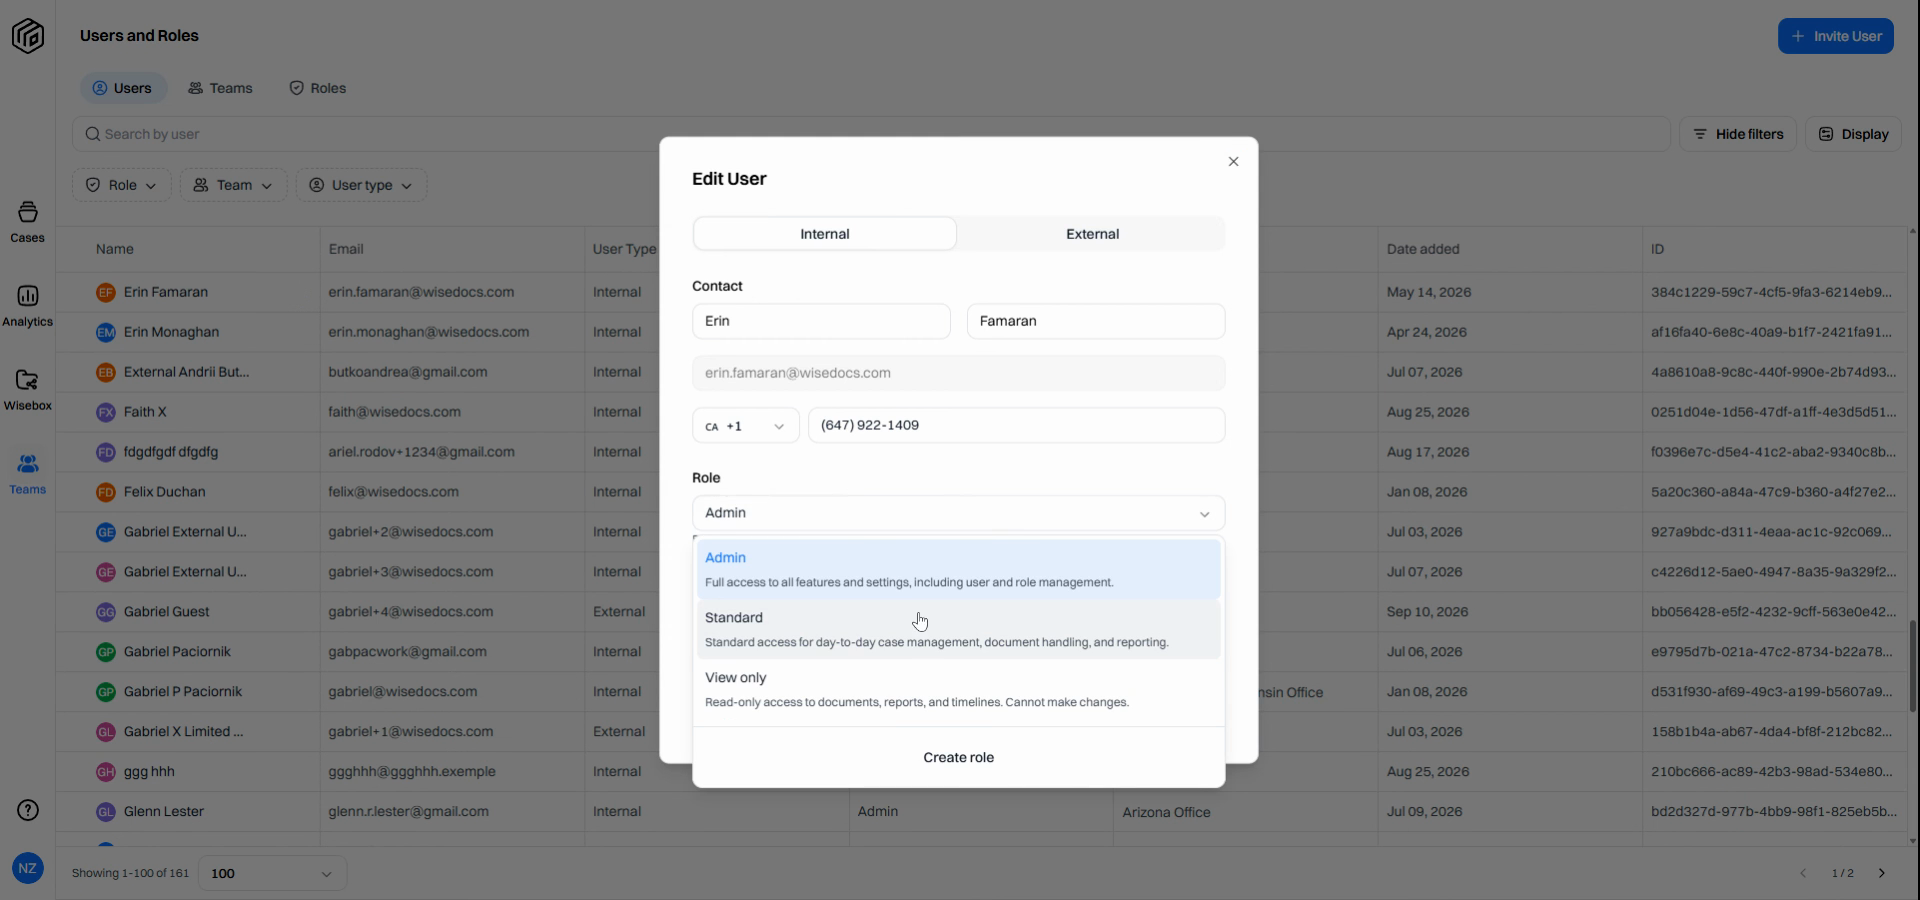
Step 4: Assign or modify the user’s Role by selecting from available roles.
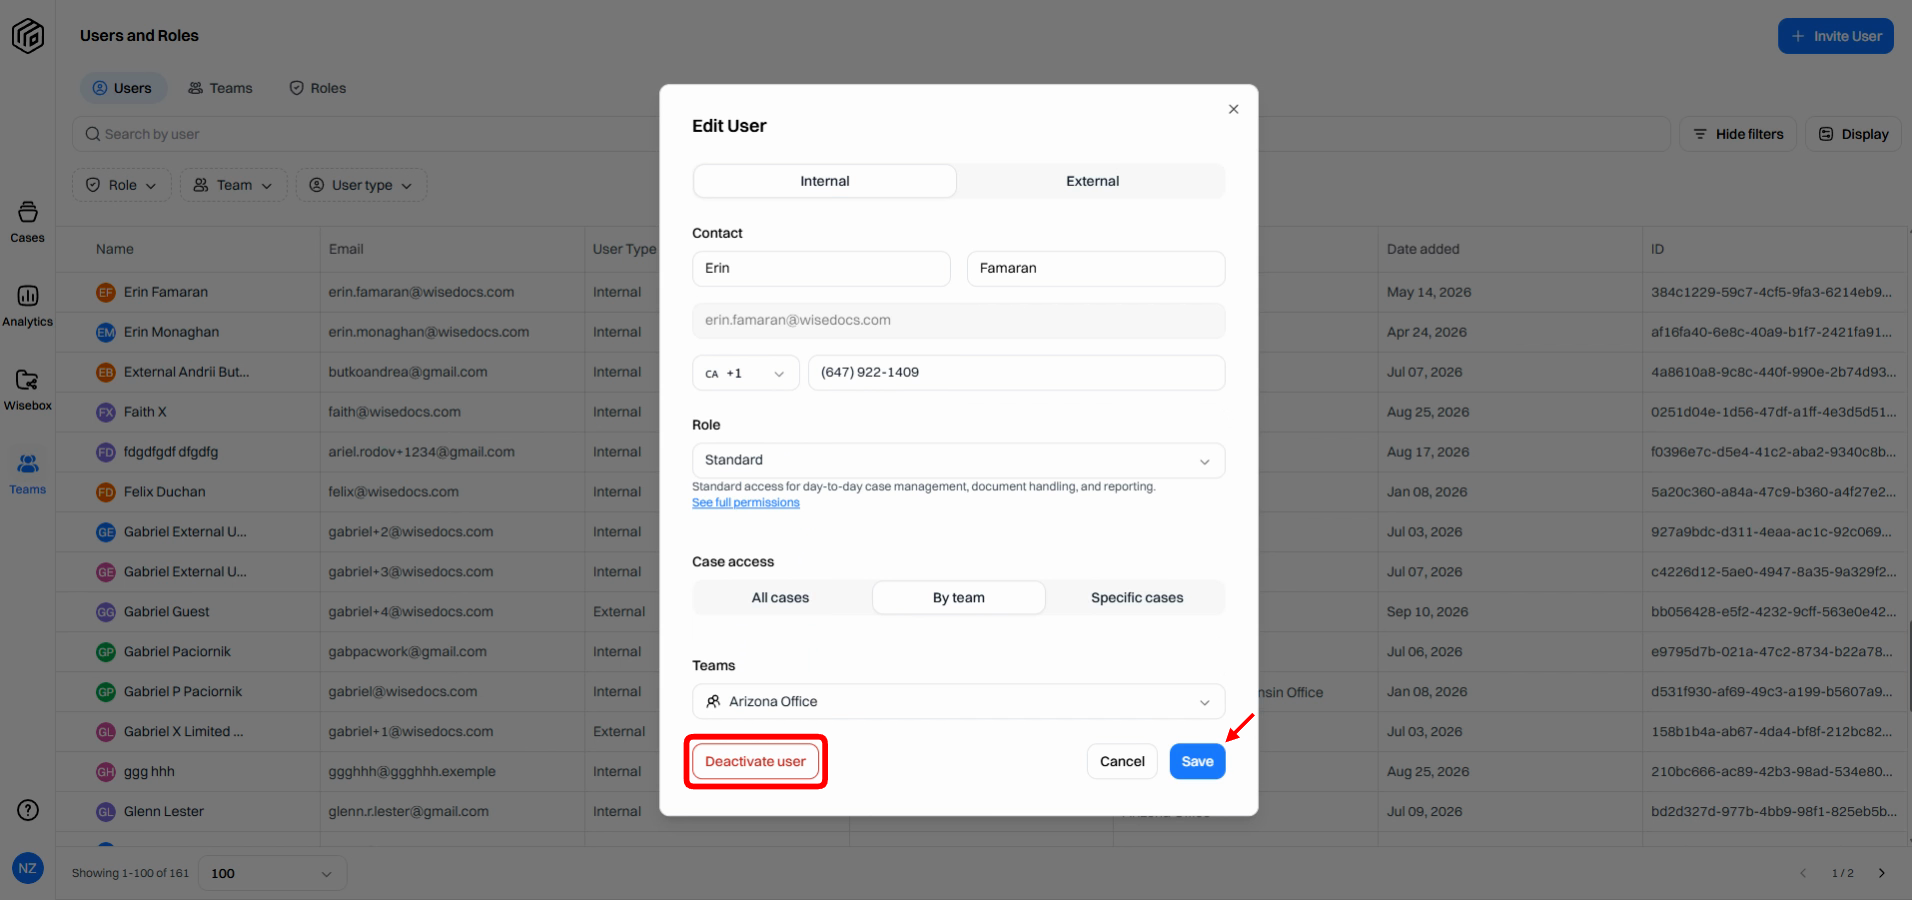
Step 5: Set up case access. Choose if the user should have access to all cases, specific teams’ cases, or only certain cases. If assigning by teams, select the exact team(s) for that user.
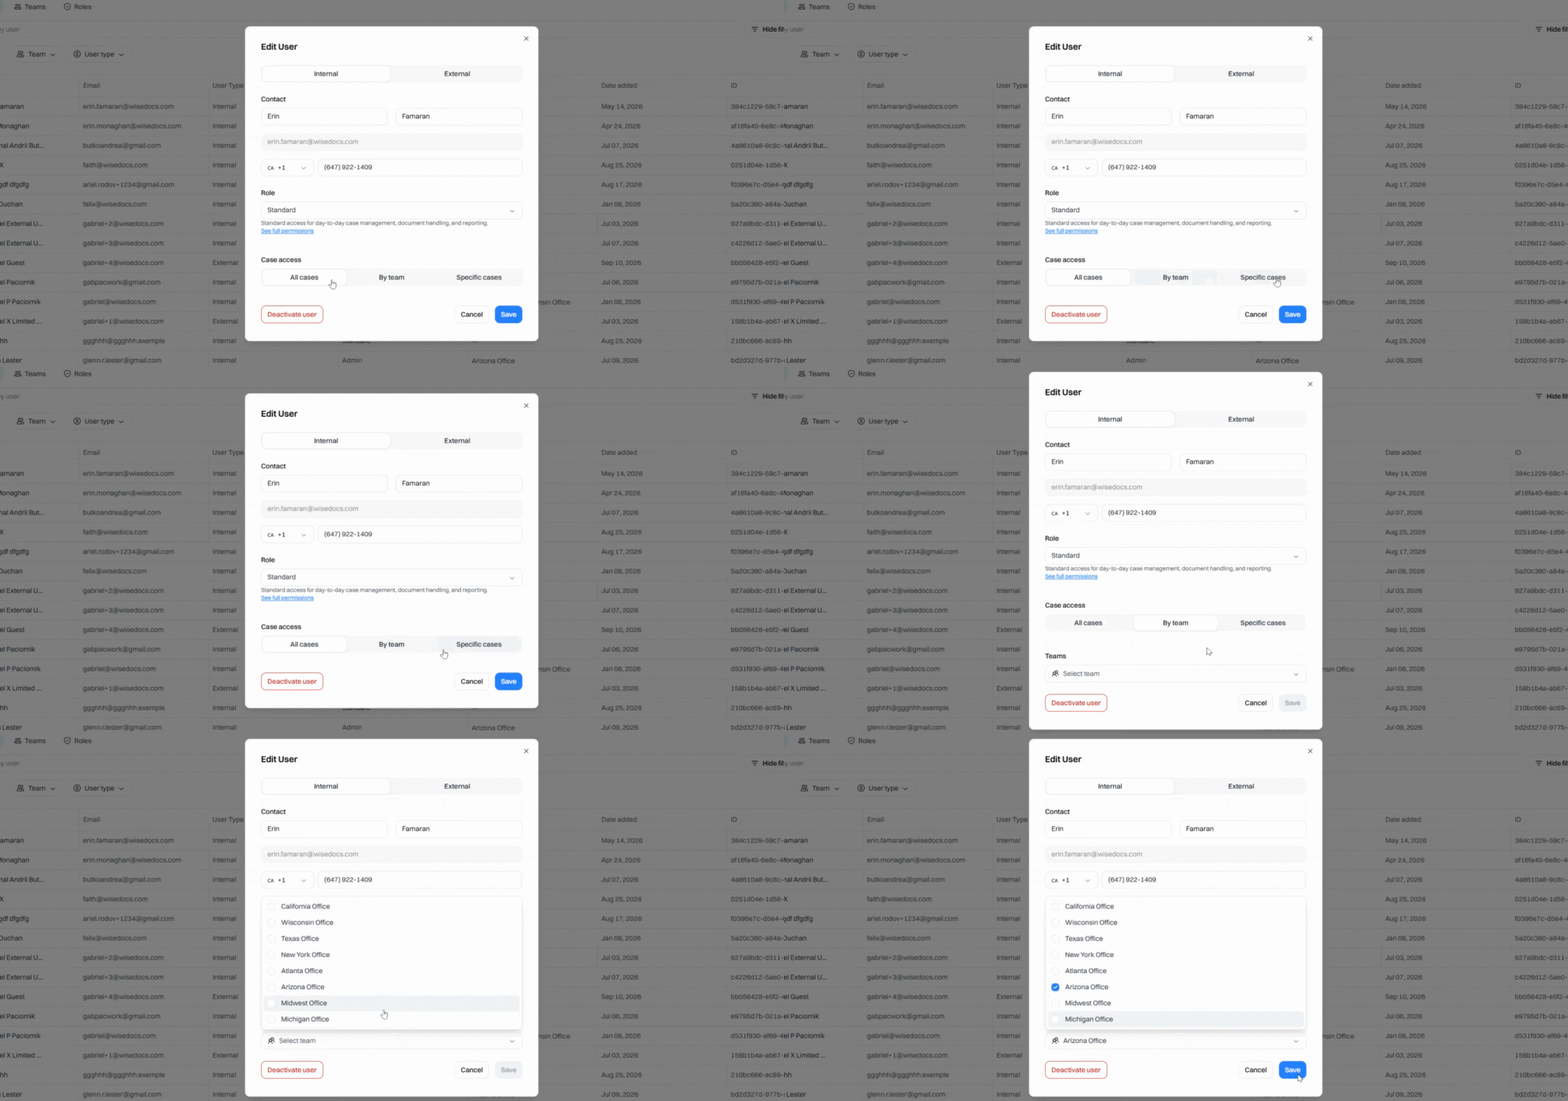
Step 6: Deactivate a user at any time by clicking Deactivate User. Remember to click Save after making changes.
Step 7: To invite a new user, click the Invite User button at the top right and fill out the required fields. Click Invite when you’re ready.
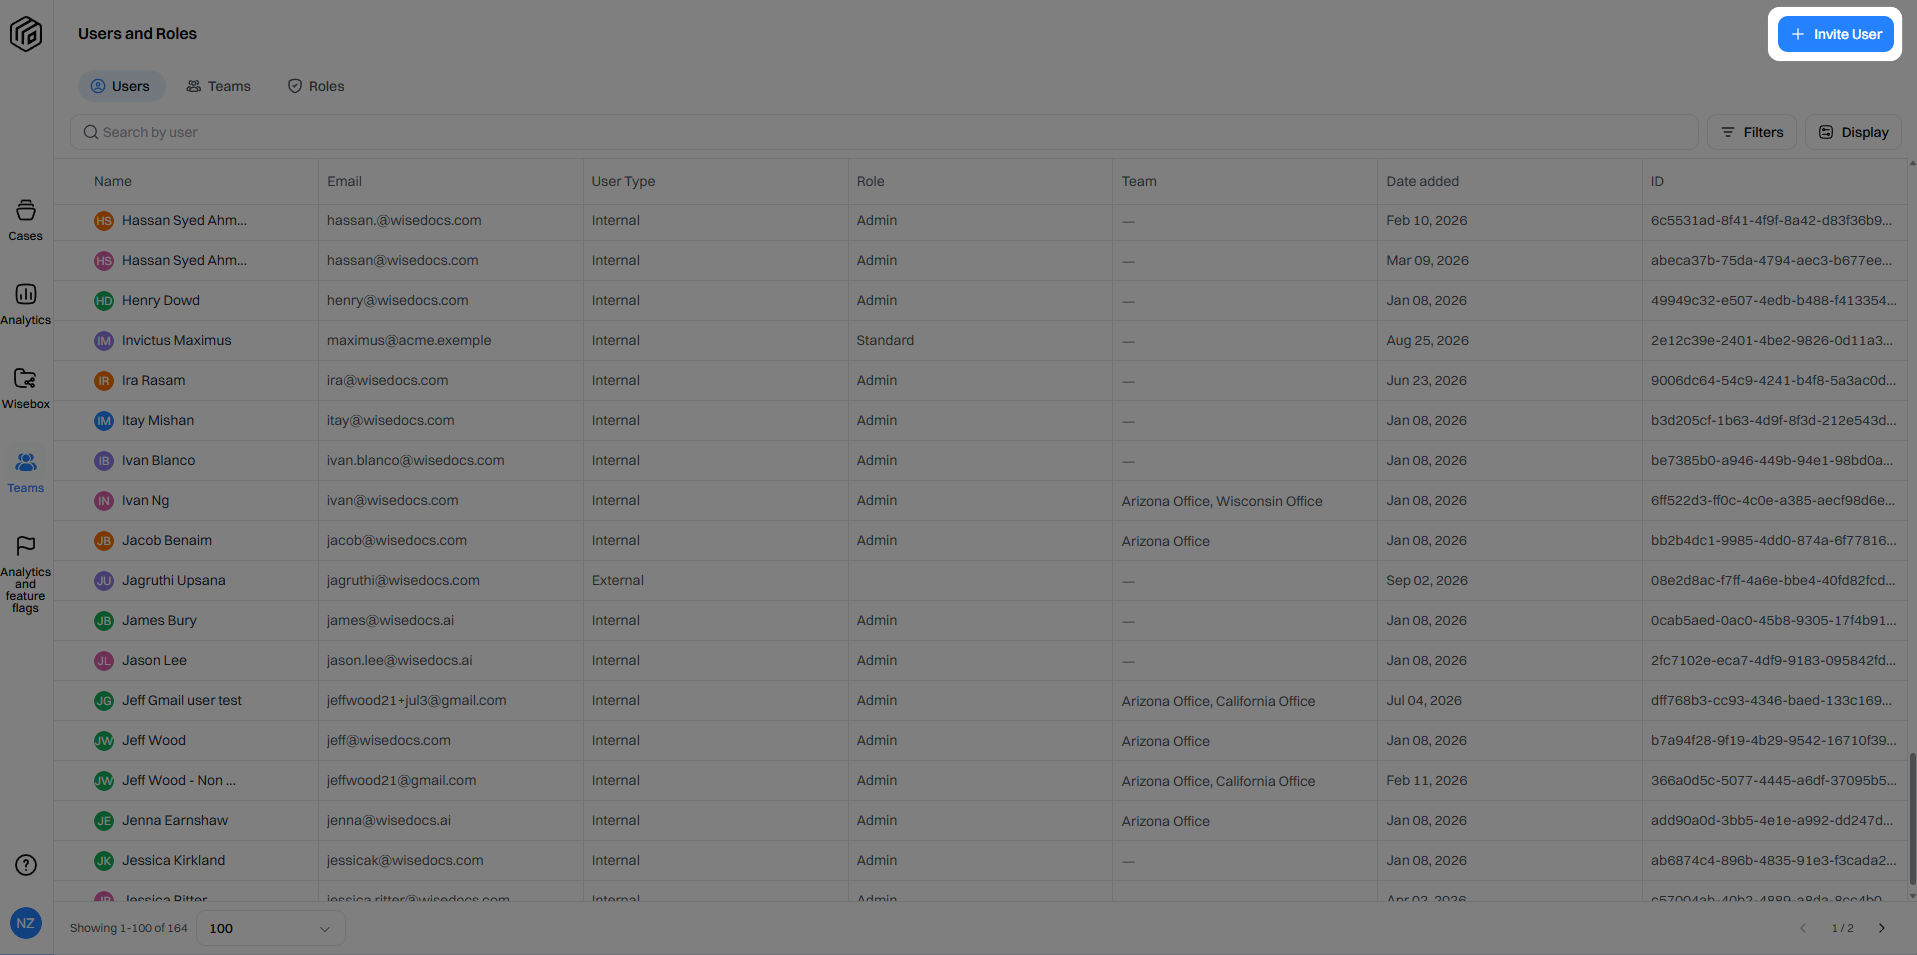
Once invited, users receive an email or can log in via SSO, depending on your organization’s setup.
Managing Teams
Teams segment access to cases. Use teams to group users by office, department, or any structure that fits your organization.
Step 1: Go to the Teams page to see all teams, search, filter, and edit team details.
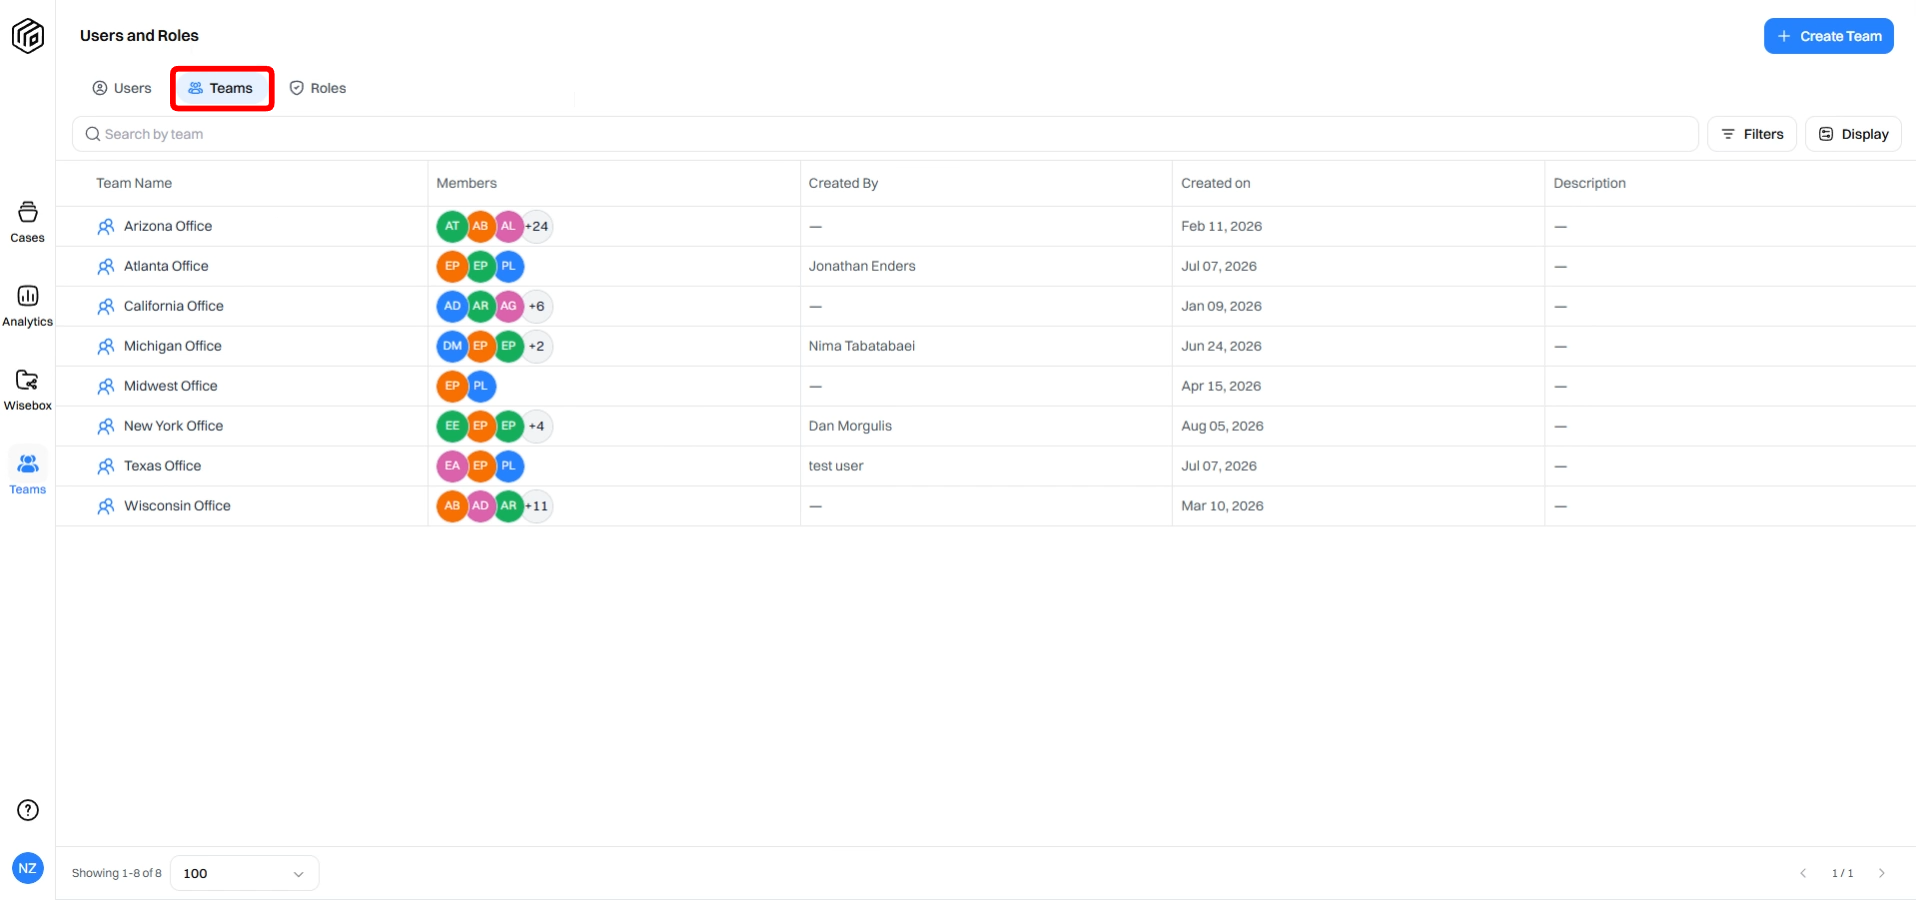
Step 2: To edit a team’s name, description, or members, click the edit icon next to the team name. Add or remove members as needed and click Save.
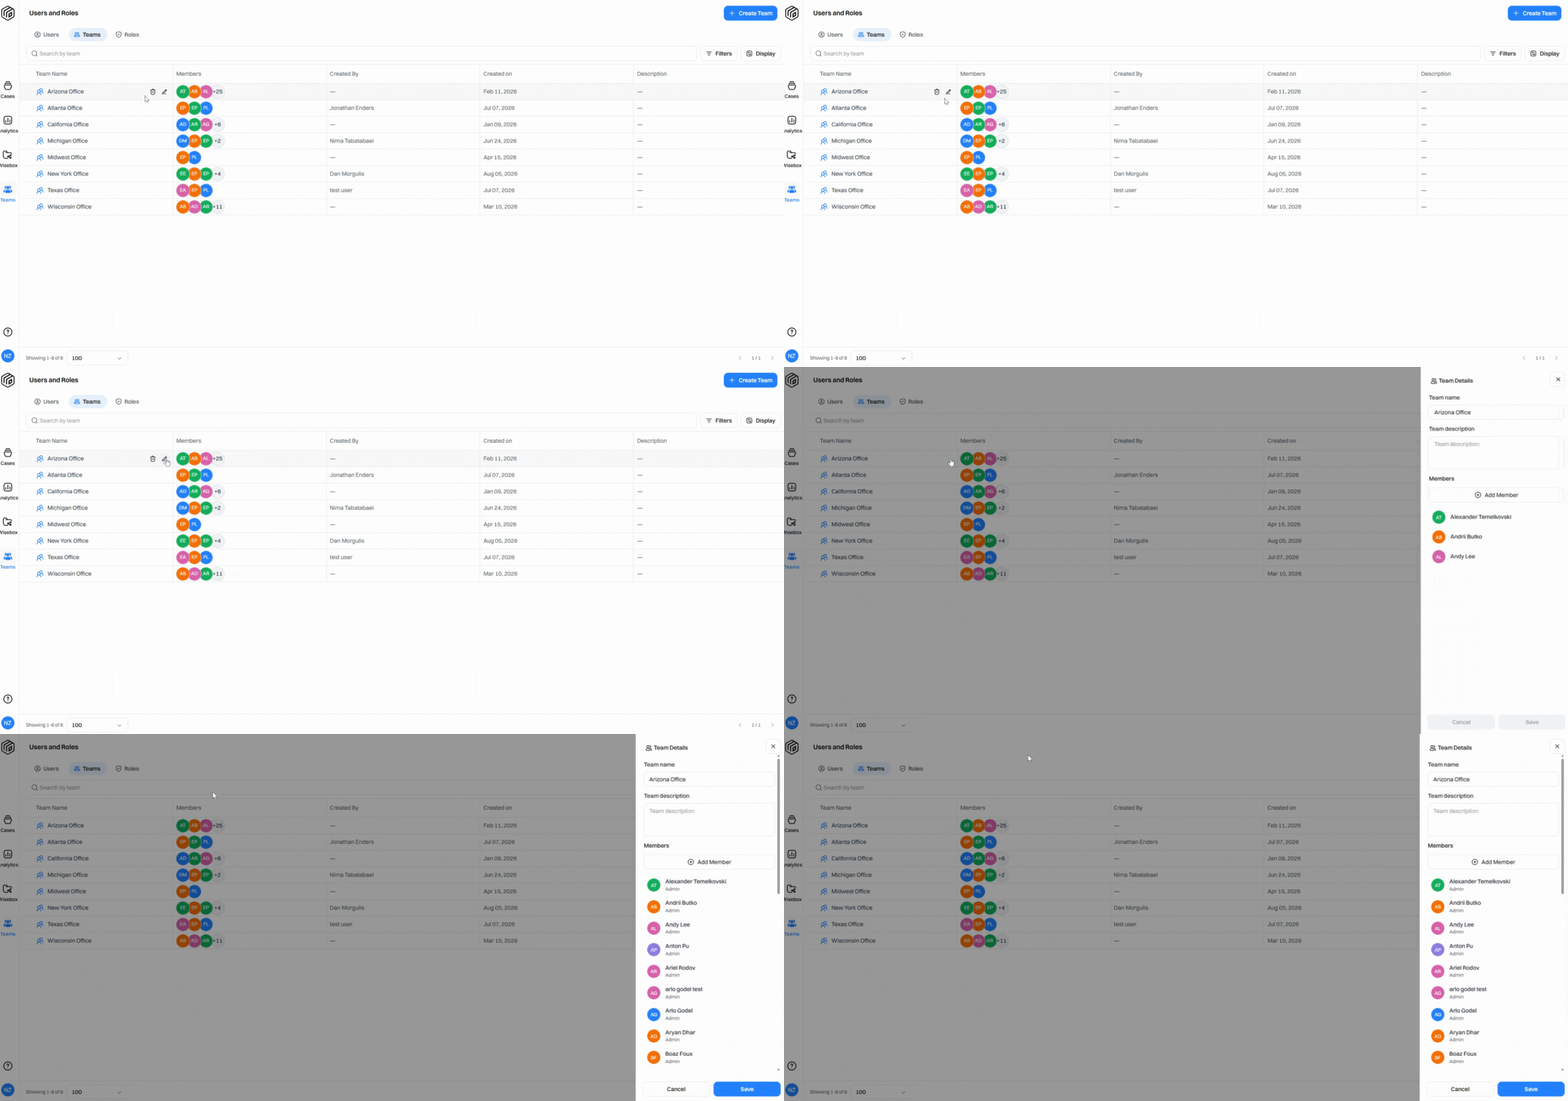
Step 3: To create a new team, click Create Team at the top right and provide the required details.
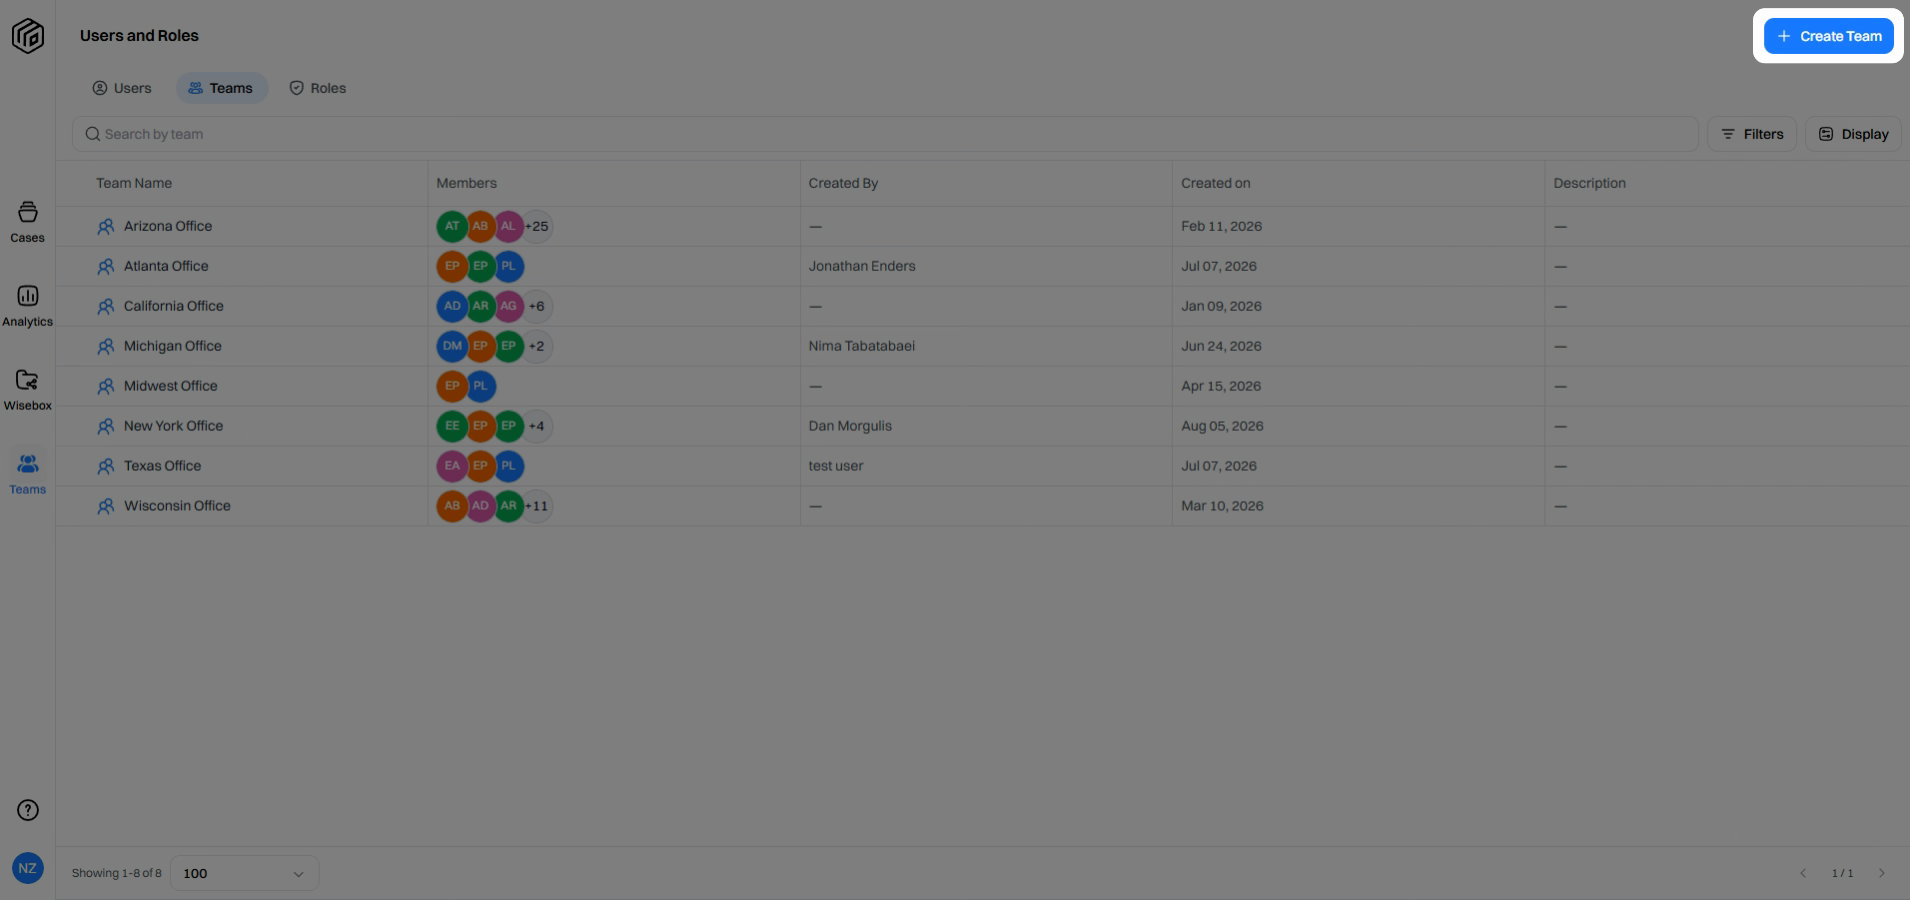
Step 4: Notify the Wisedocs team of any changes to team names to ensure built-in automations keep working correctly.
Managing Roles
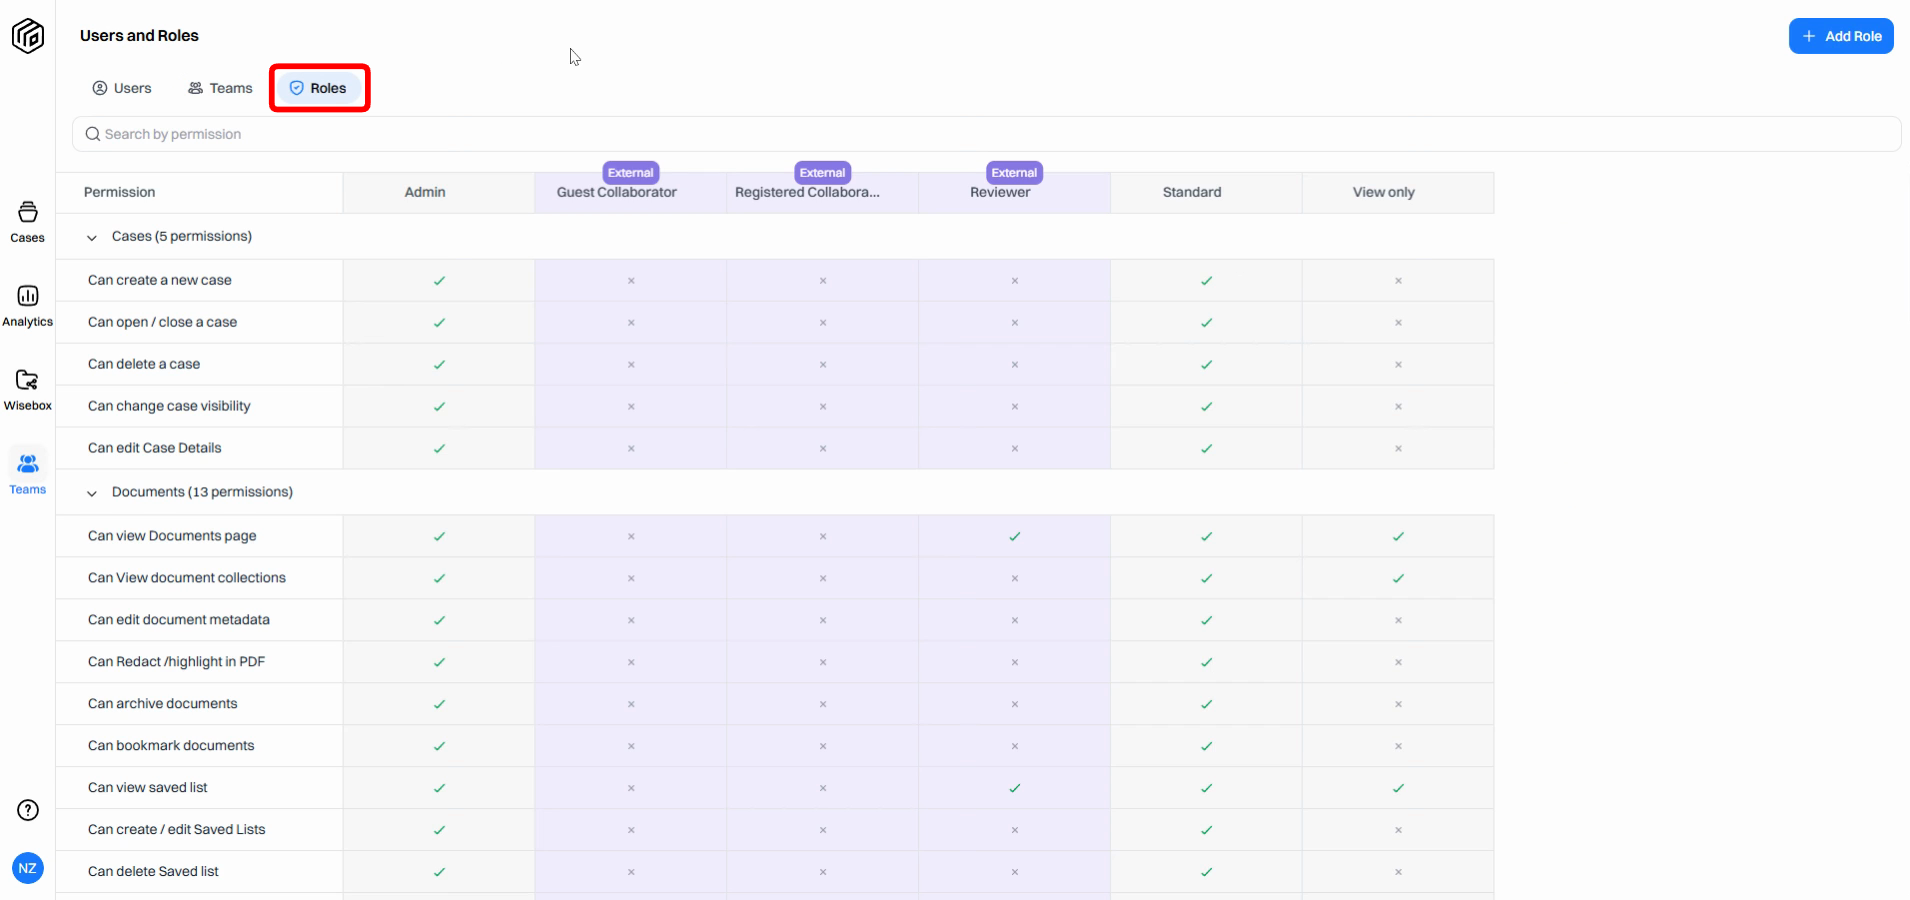
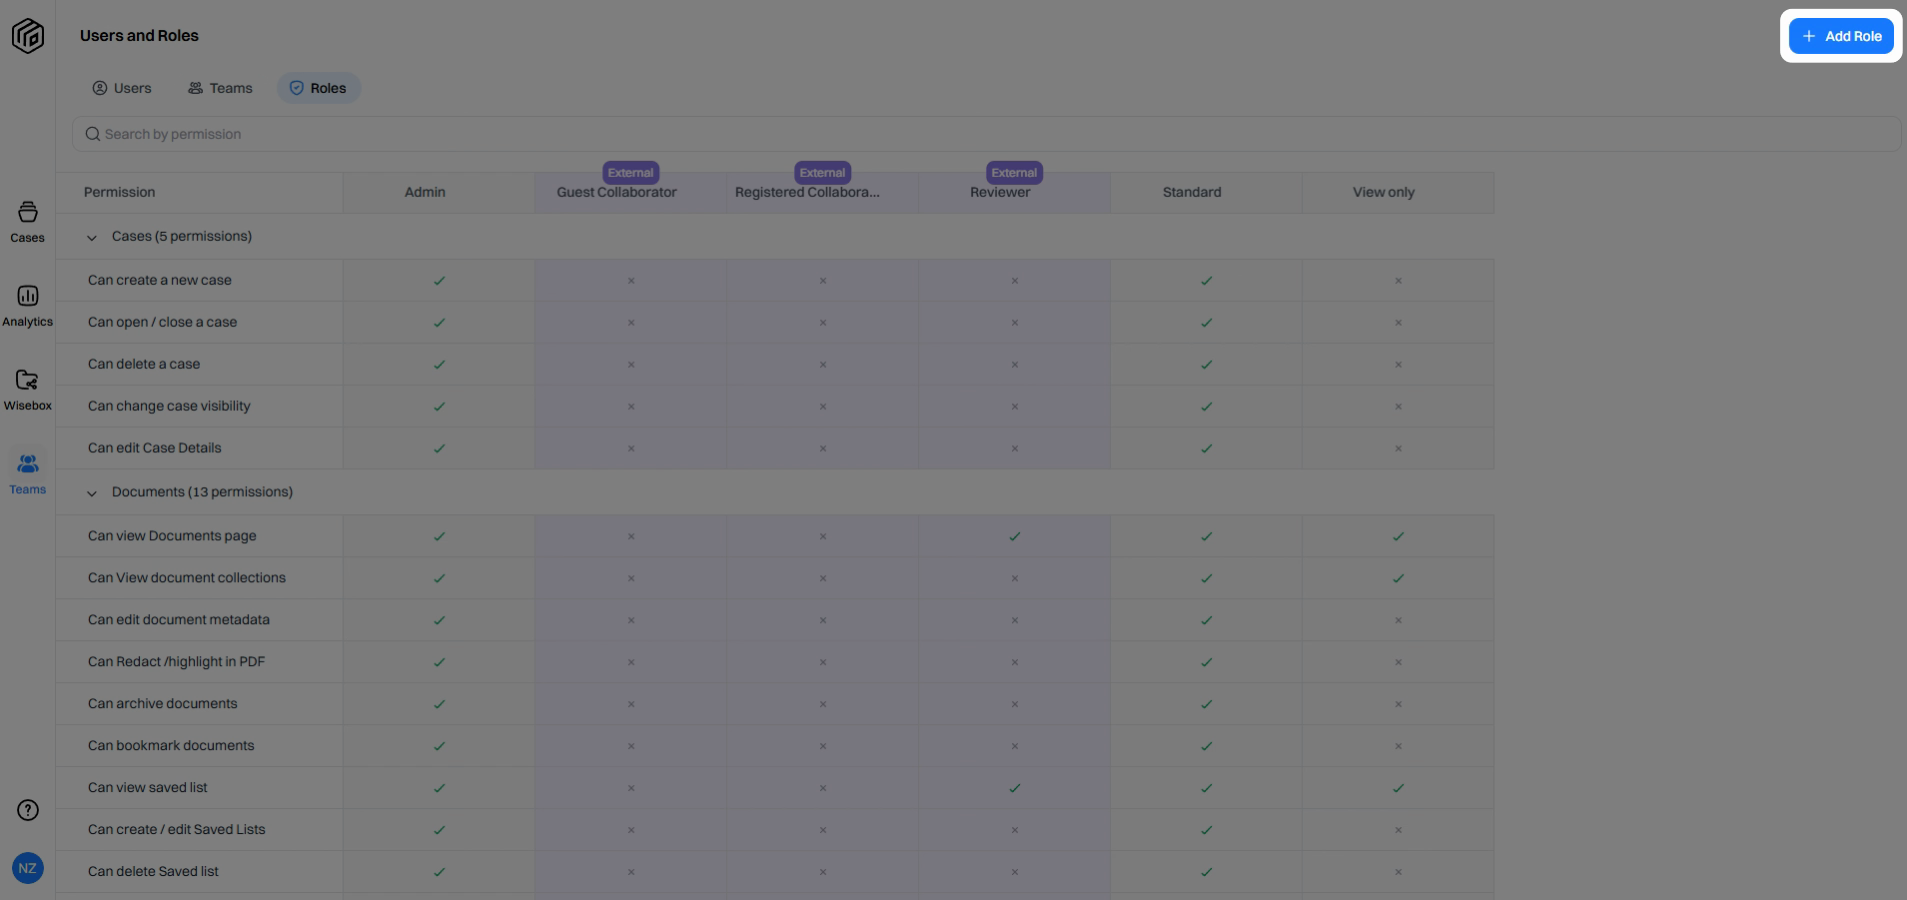
Roles decide which actions users can take within cases, such as creating or deleting cases or accessing specific features.
Step 1: On the Roles page, view all active roles and their permissions.
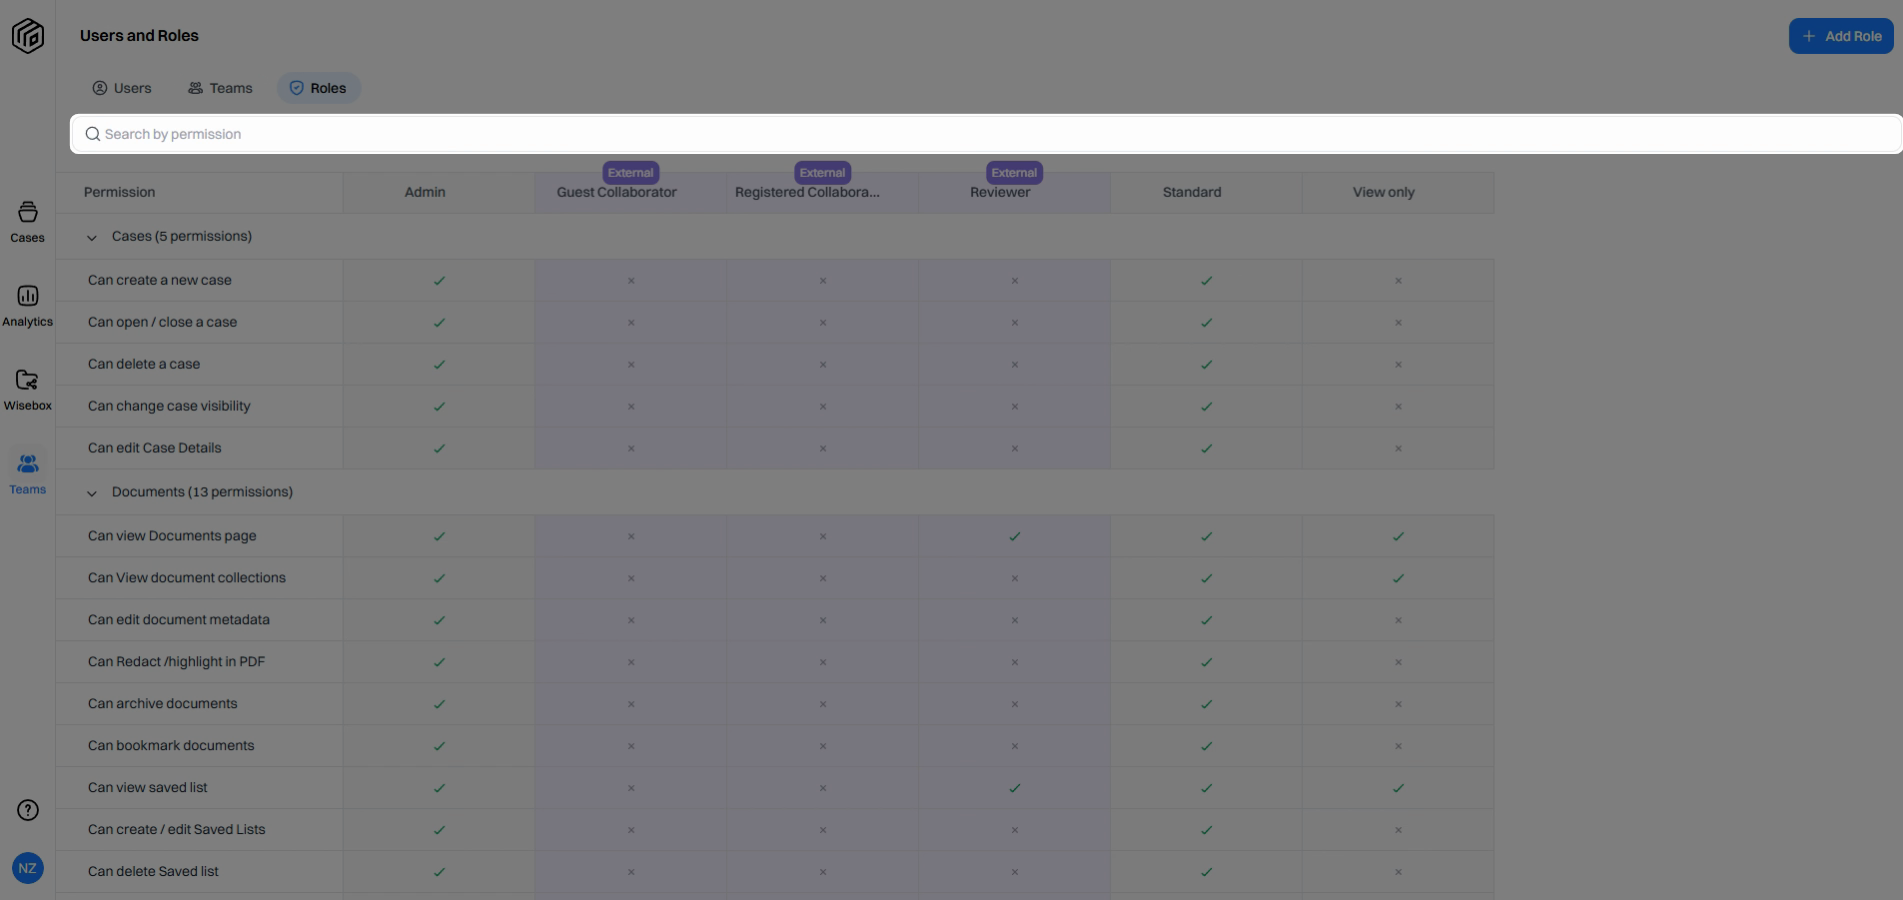
Step 2: Search across permissions to find out if a specific role grants an action you’re looking for.
Step 3: Need a custom role? Contact your Customer Success Manager to request custom roles if the defaults aren't a fit.
Case-Level Permissions
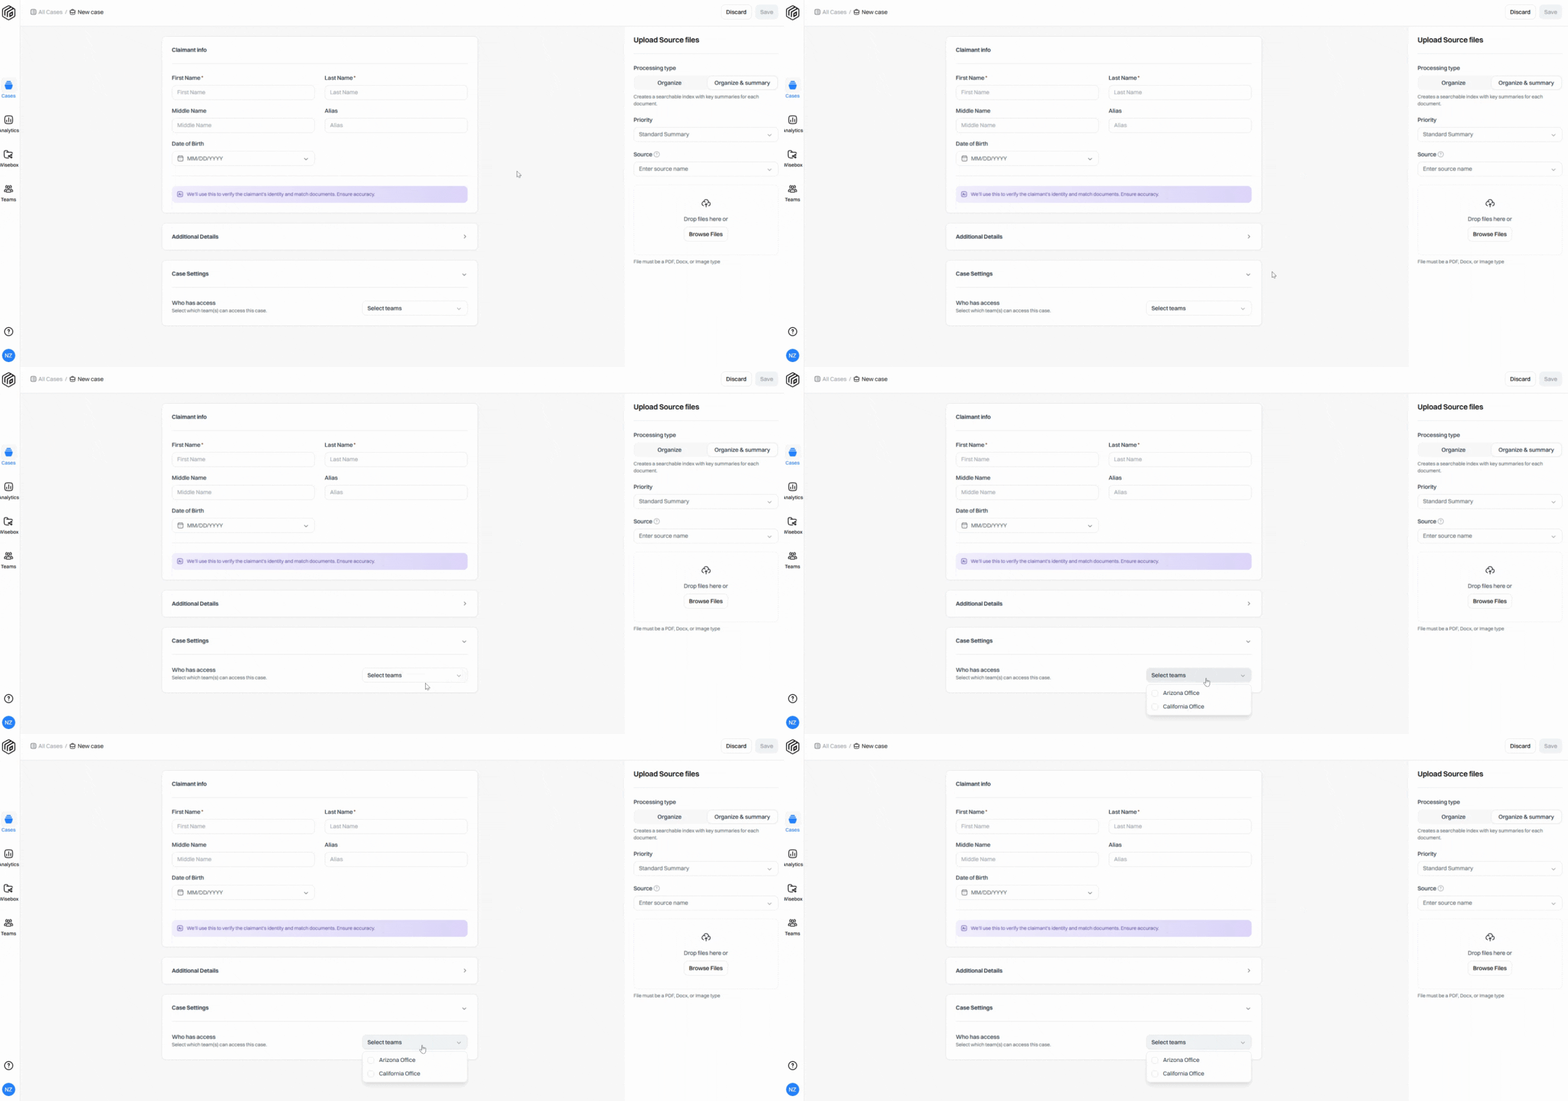
You can further control access directly at the case level when creating or editing a case.
Step 1: When creating a new case, associate one or more teams with it. If you belong to more than one team, select which teams should have access.
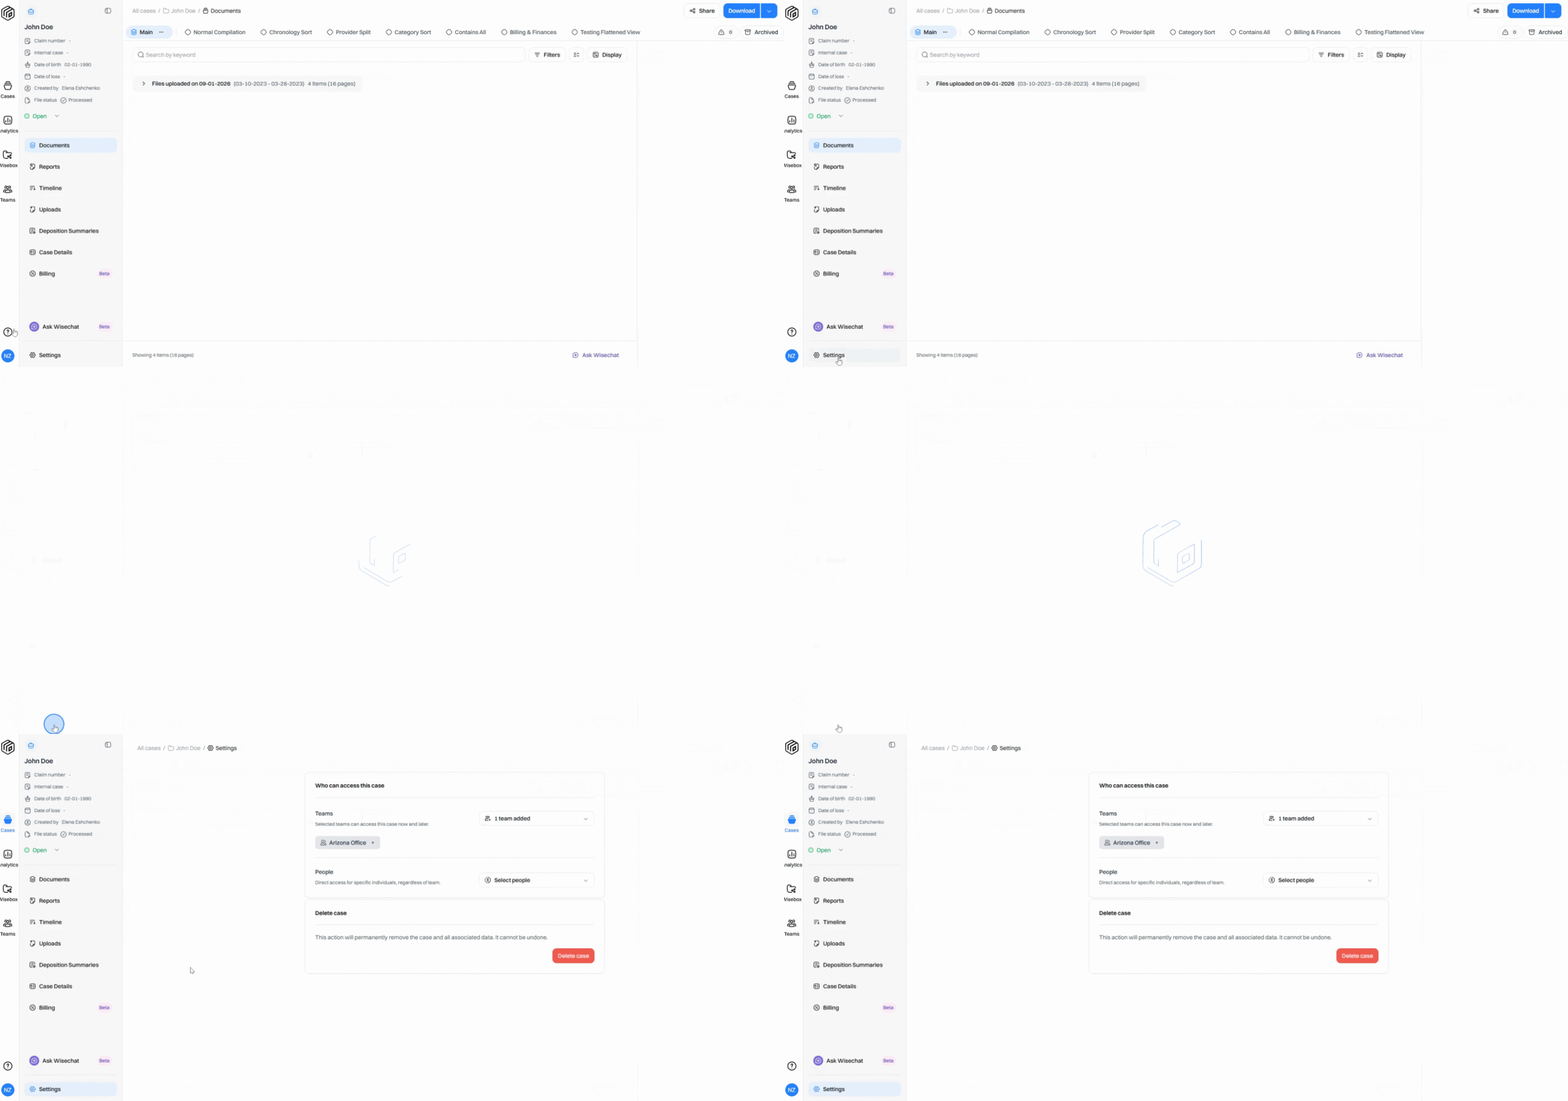
Step 2: After a case is created, adjust access in the Settings tab. Add or remove teams and give specific people access as needed. Changes here save automatically.
Internal vs. External Users
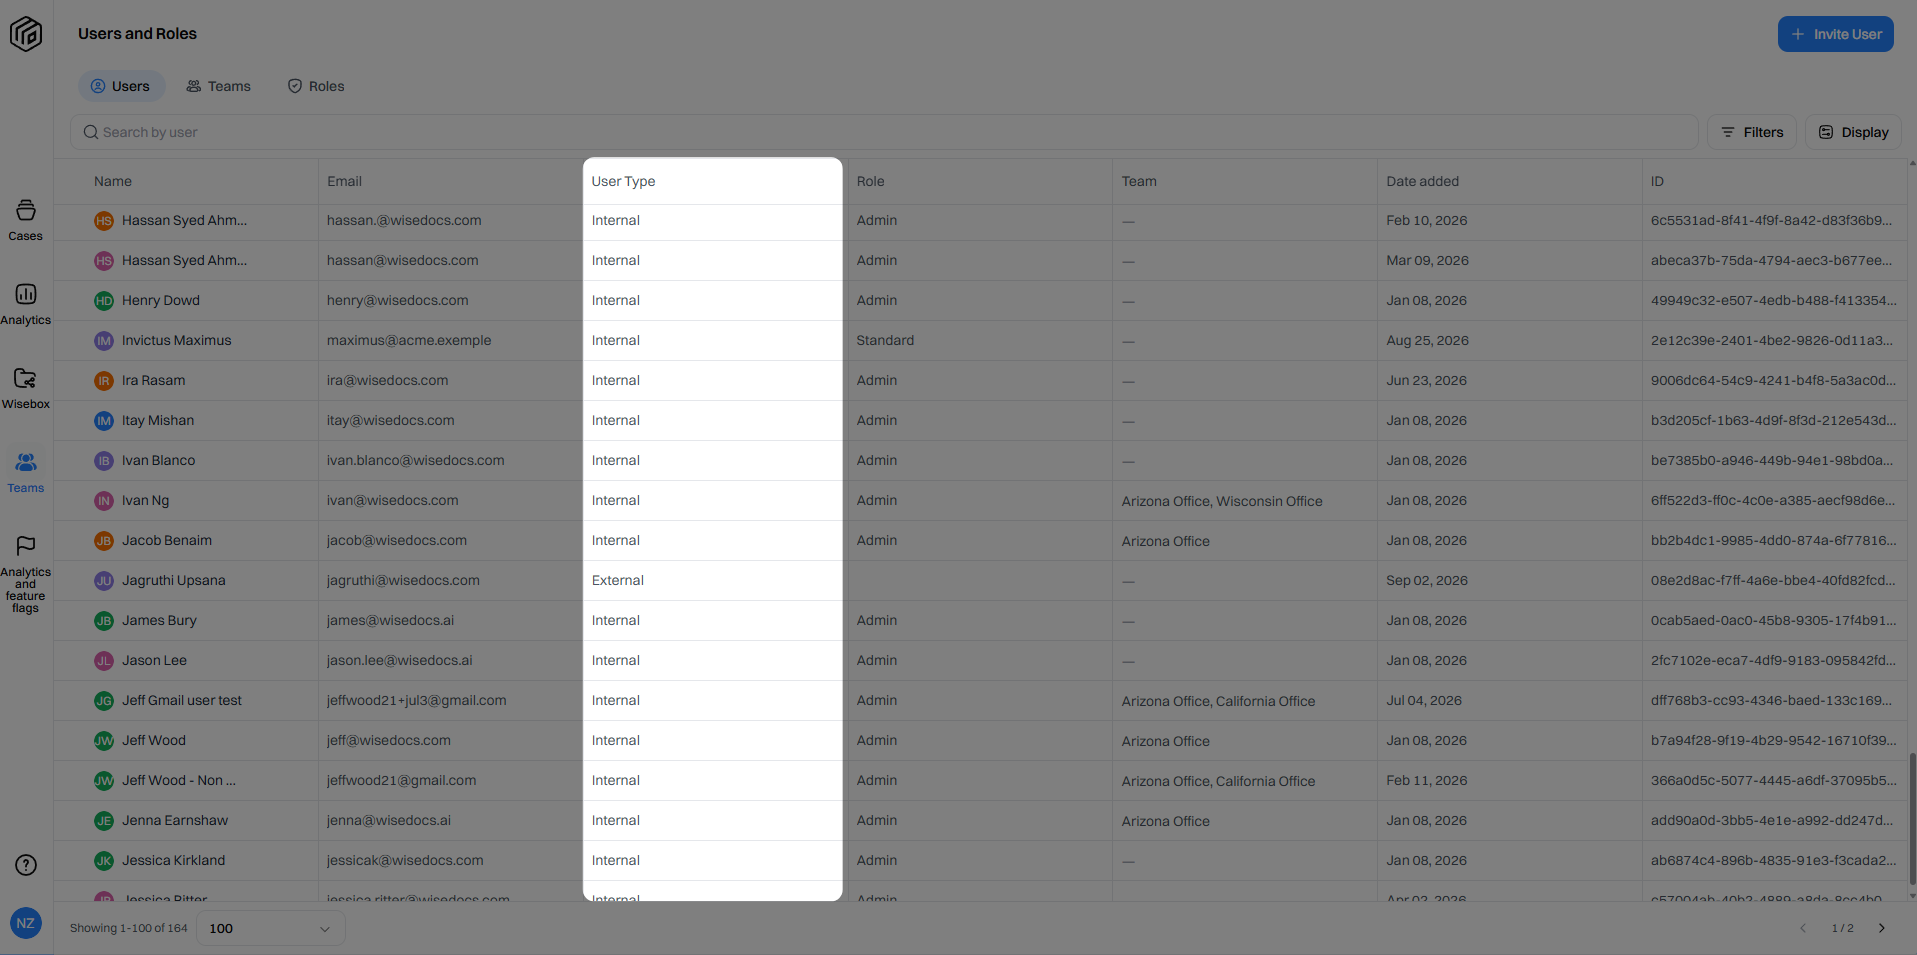
Internal users are assigned to teams and receive permissions based on their roles. External users — often collaborators or clients outside your organization — can only access specific cases you invite them to, and have limited permissions compared to internal users.
Wisedocs’ User Permissions feature gives you secure, scalable, and flexible control over user access and actions. Assign users to the right teams and roles to keep your data safe and your workflows efficient.