Pinning Documents
Last updated: September 30, 2026
Pinning Documents in Wisedocs
When managing a complex claim, you need quick access to critical records. The pinning feature in Wisedocs lets you keep important documents right at the top of your workspace, making reviews smoother and more efficient. Here’s how to use document pinning within your case collections.
Step 1: Enter a case. You'll see documents organized by collections.
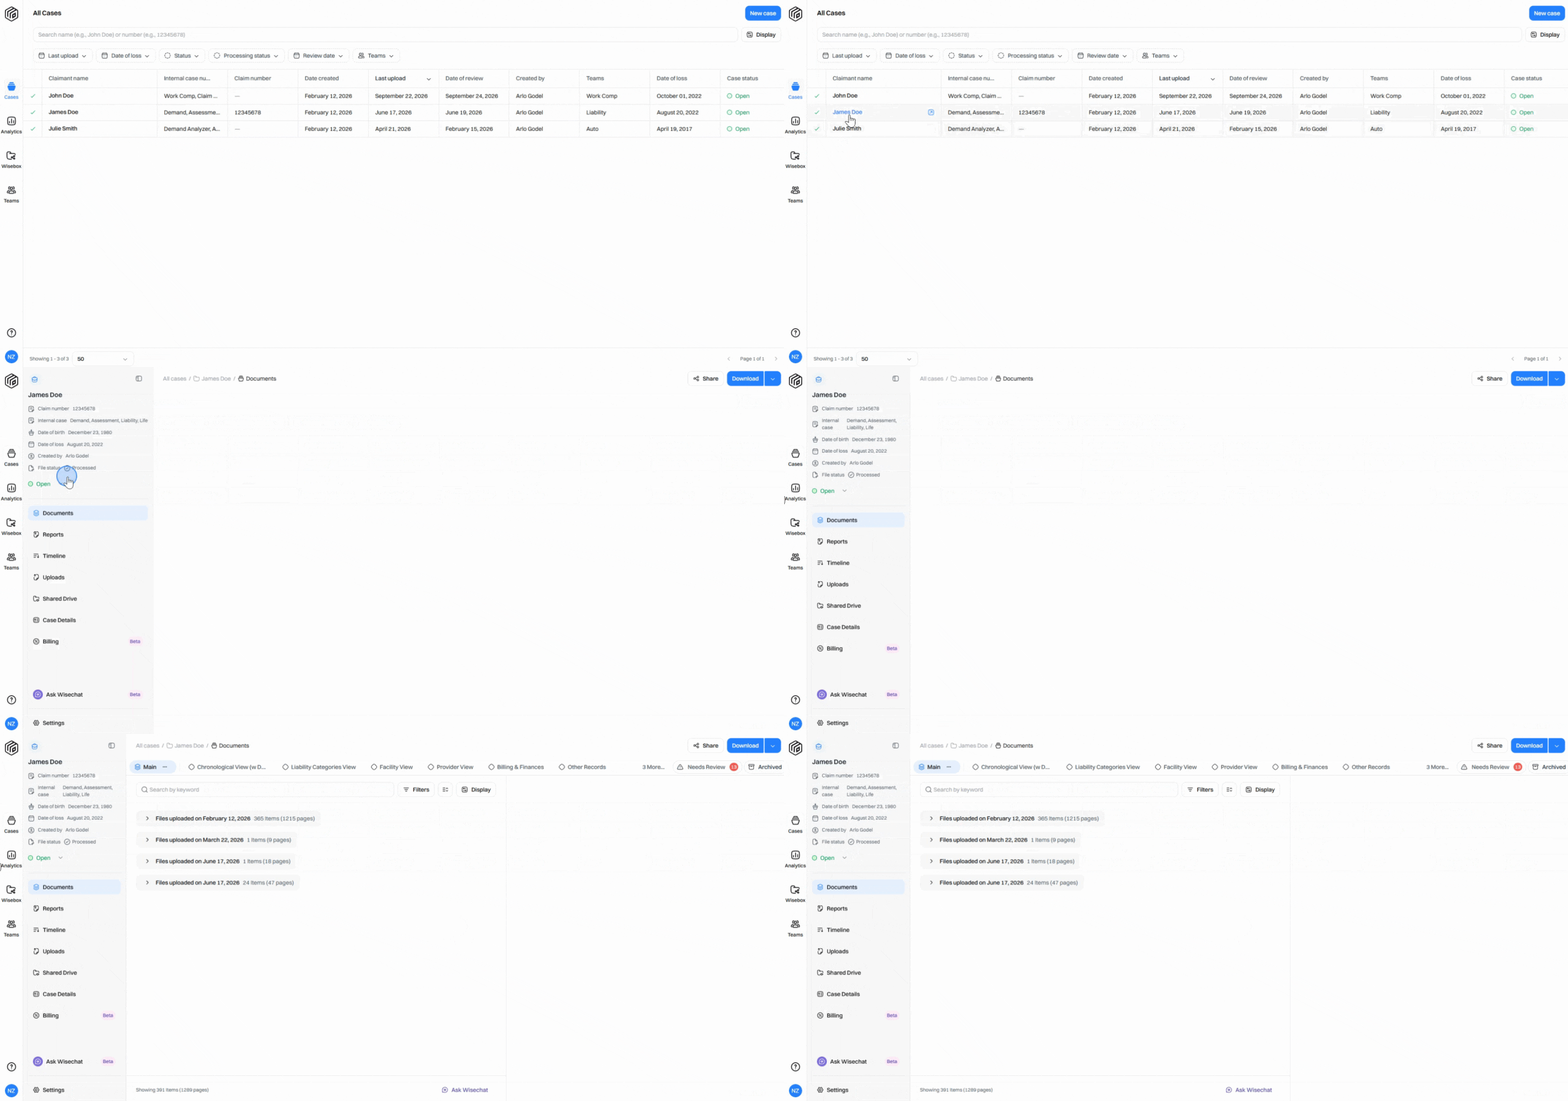
Step 2: Select a collection to start reviewing its documents.
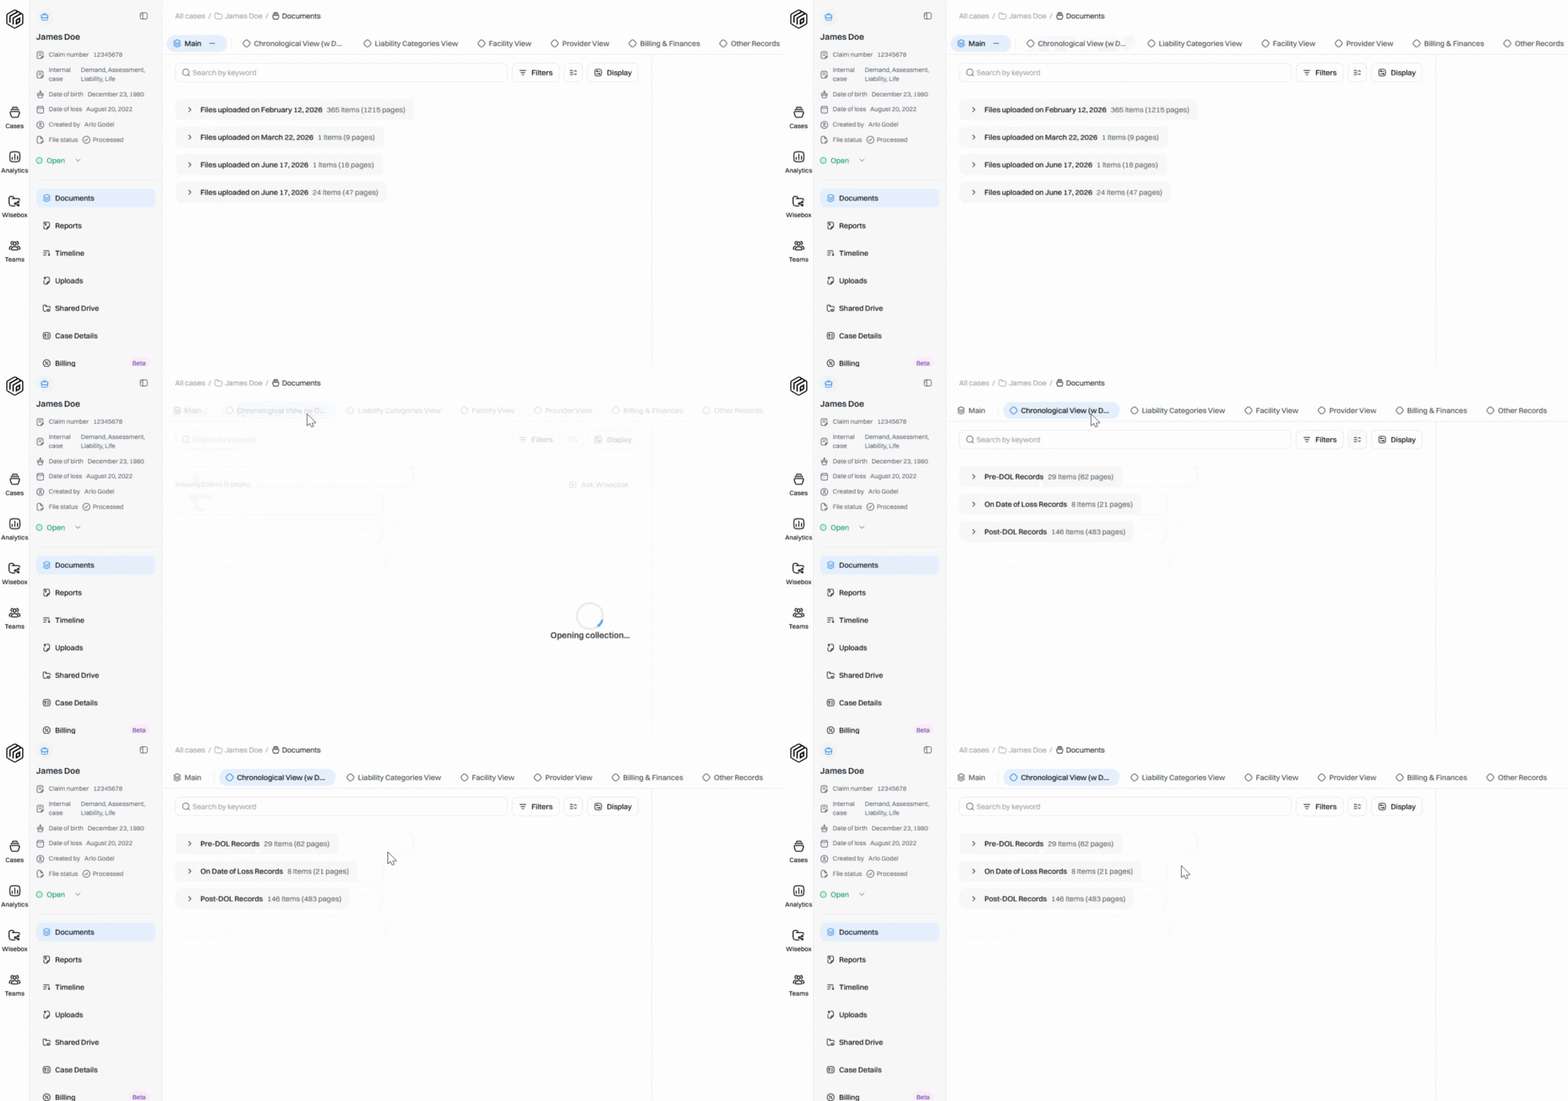
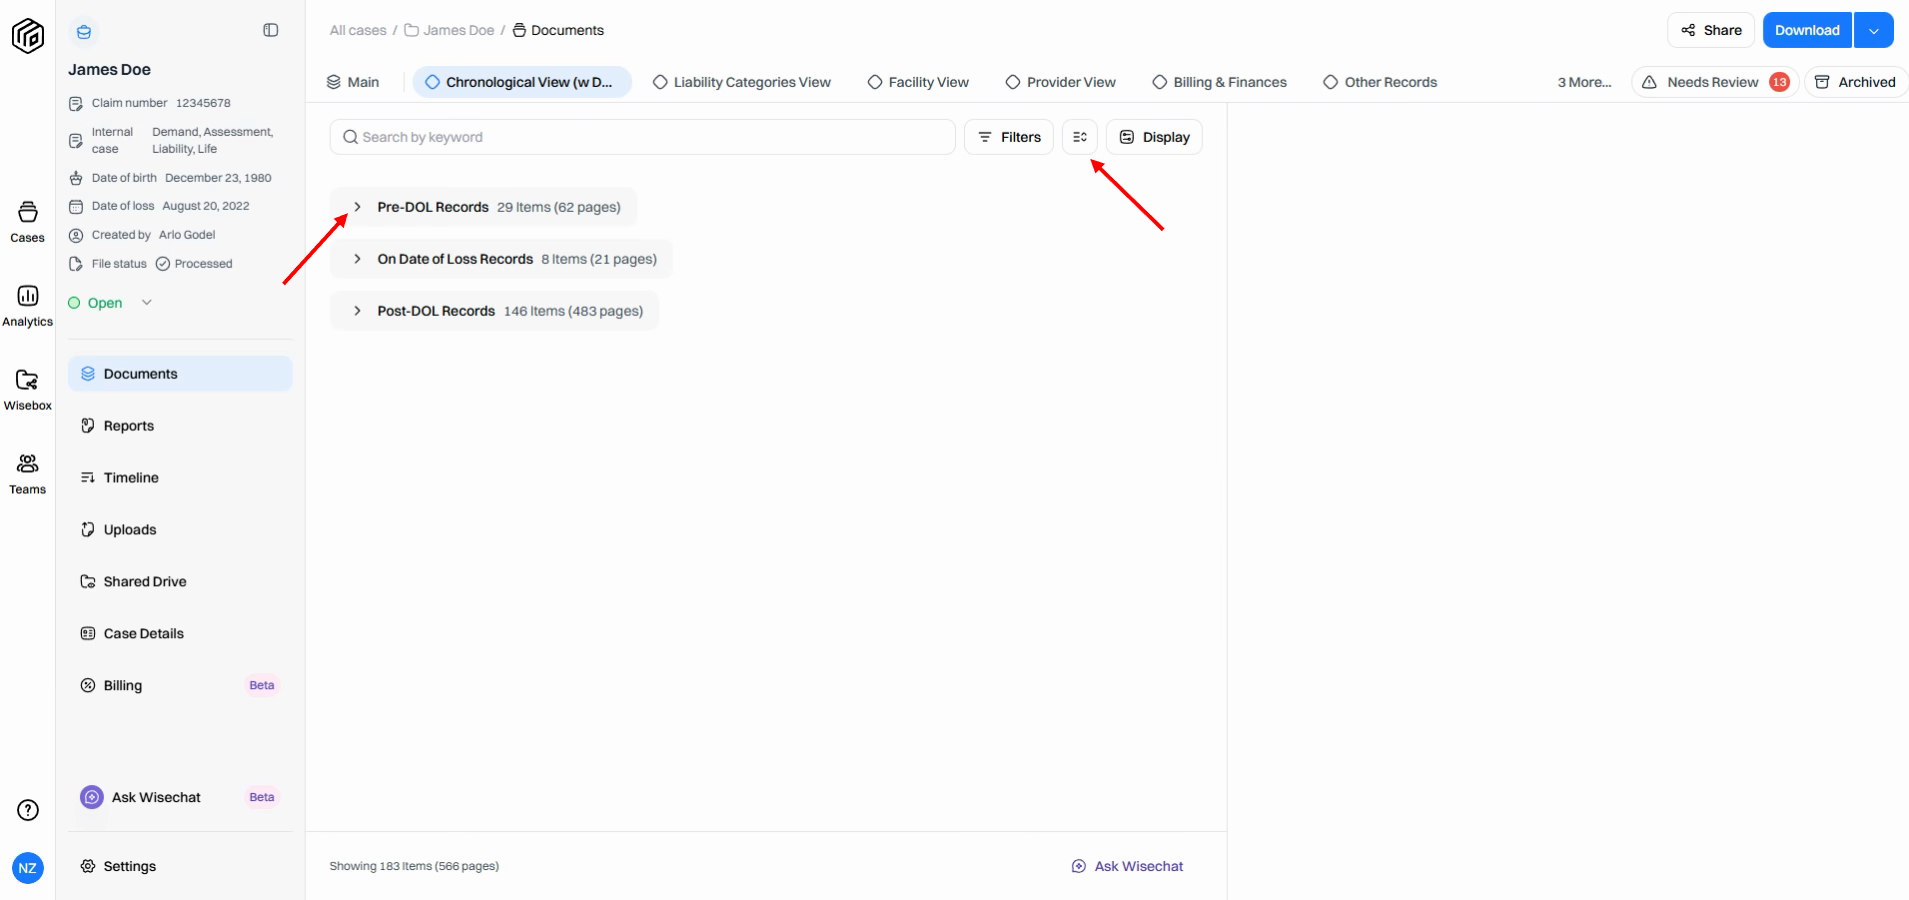
Step 3: Expand a table by clicking the Table arrow or the Expand All Tables button.
Step 4: Hover over the document you want to pin. A checkbox appears. Click the checkbox to select the document.
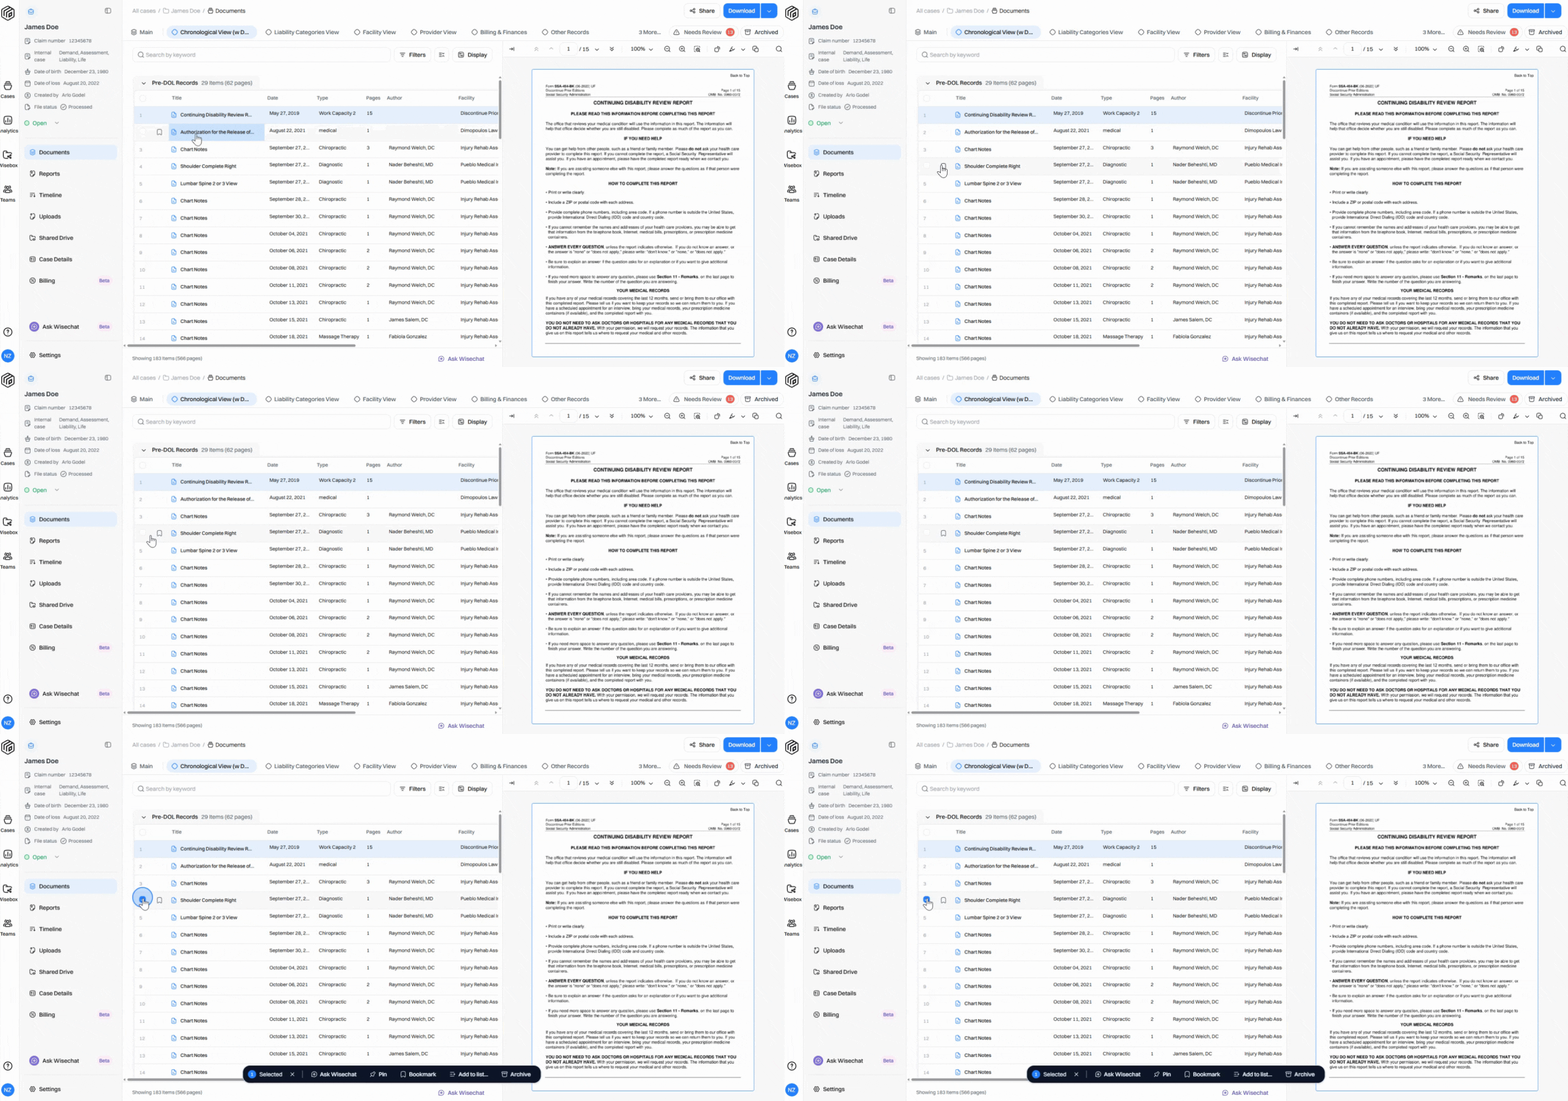
Step 5: In the toolbar, click Pin. The document will move to the top of its table and show a thumbtack icon for easy identification.
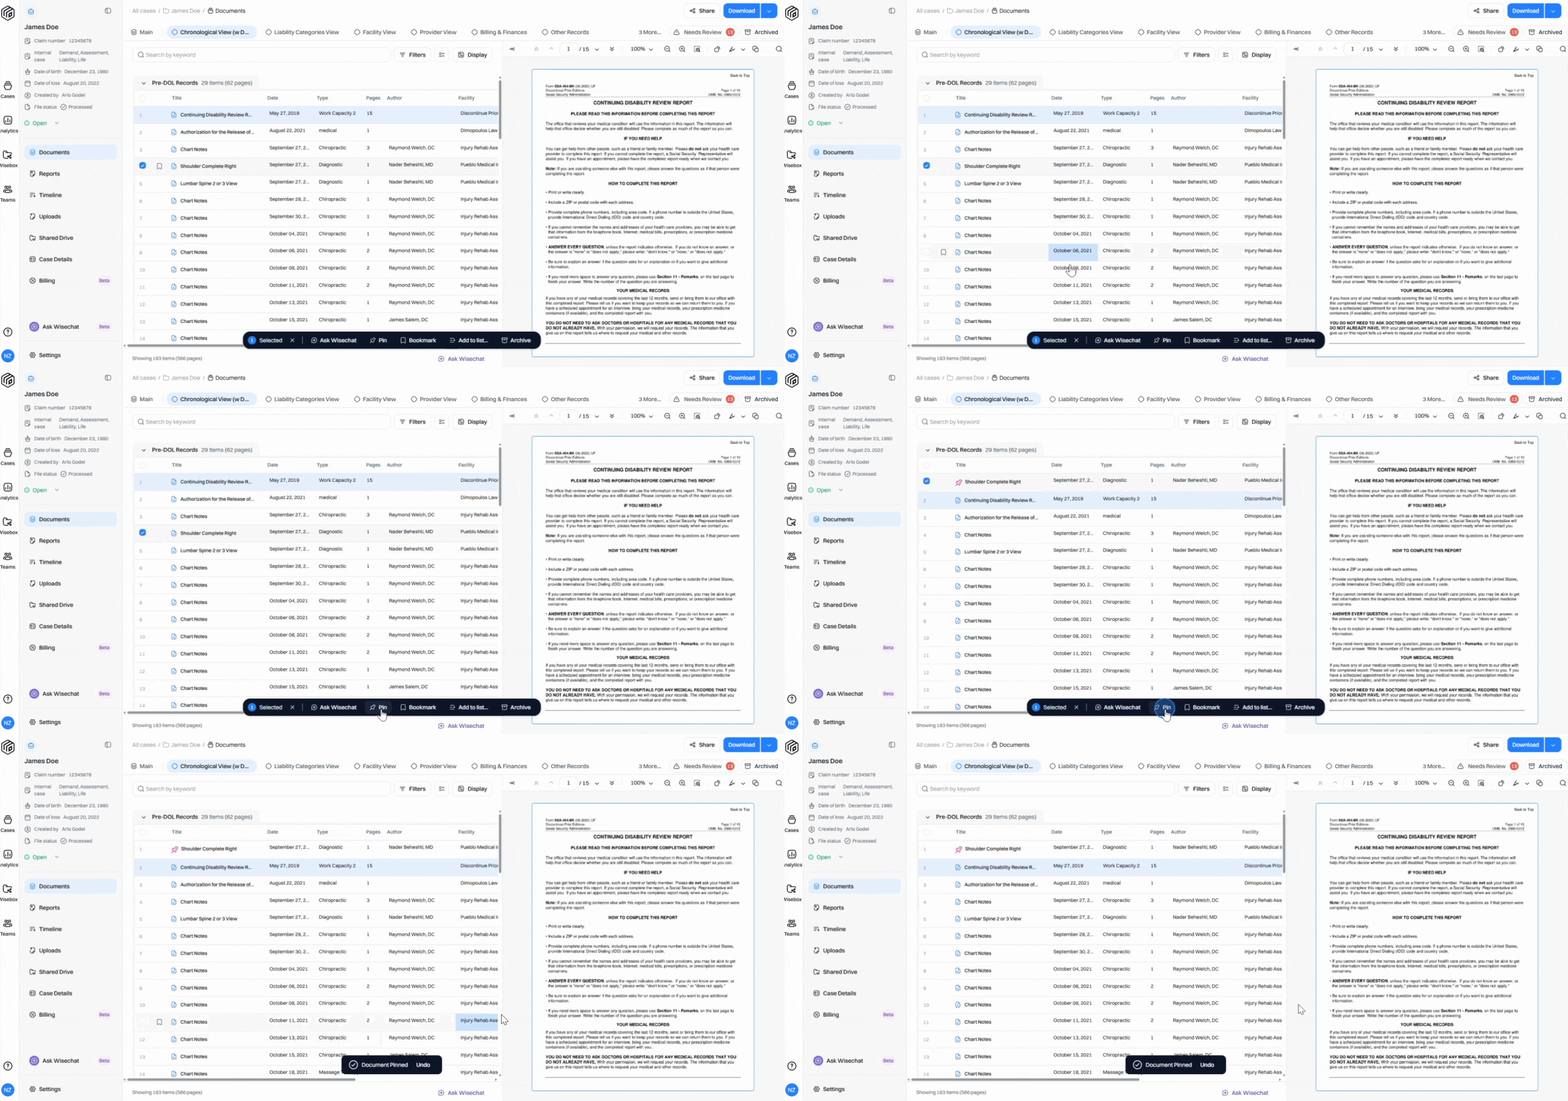
Step 6: To pin multiple documents, select each desired document and click Pin again from the toolbar.
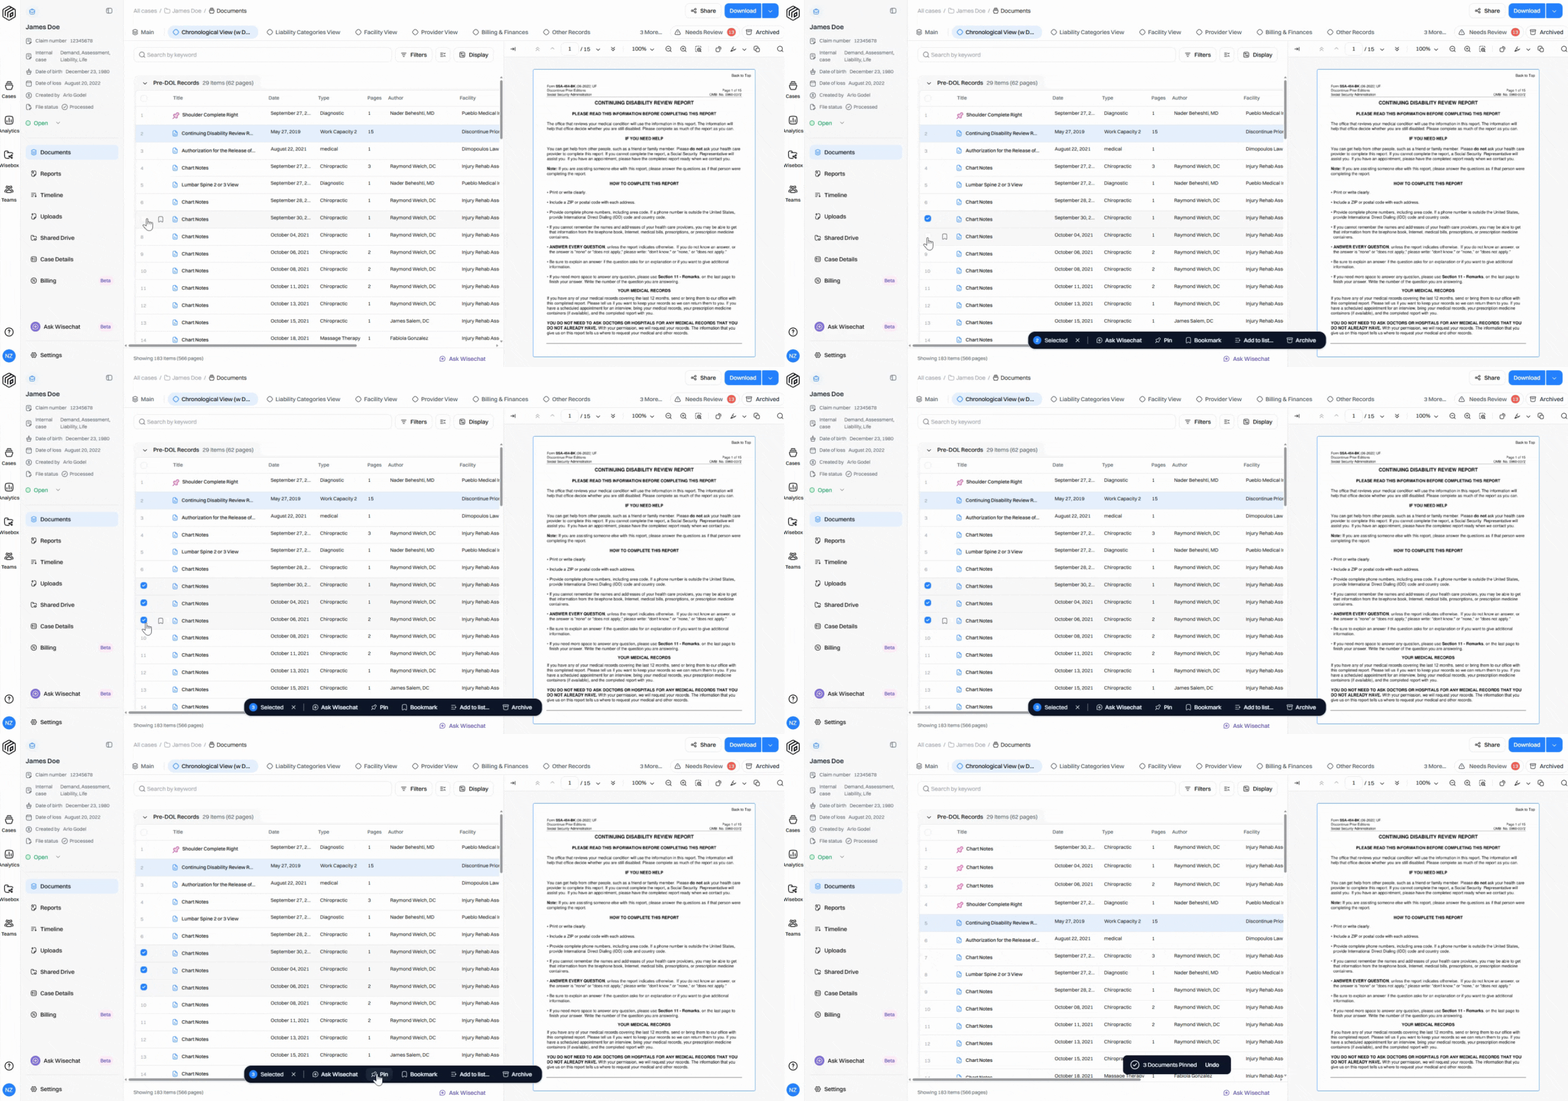
Each new pinned document is placed at the top, ahead of previously pinned records.
Step 7: If you need to unpin a document, select one or more documents, and click Unpin in the toolbar.
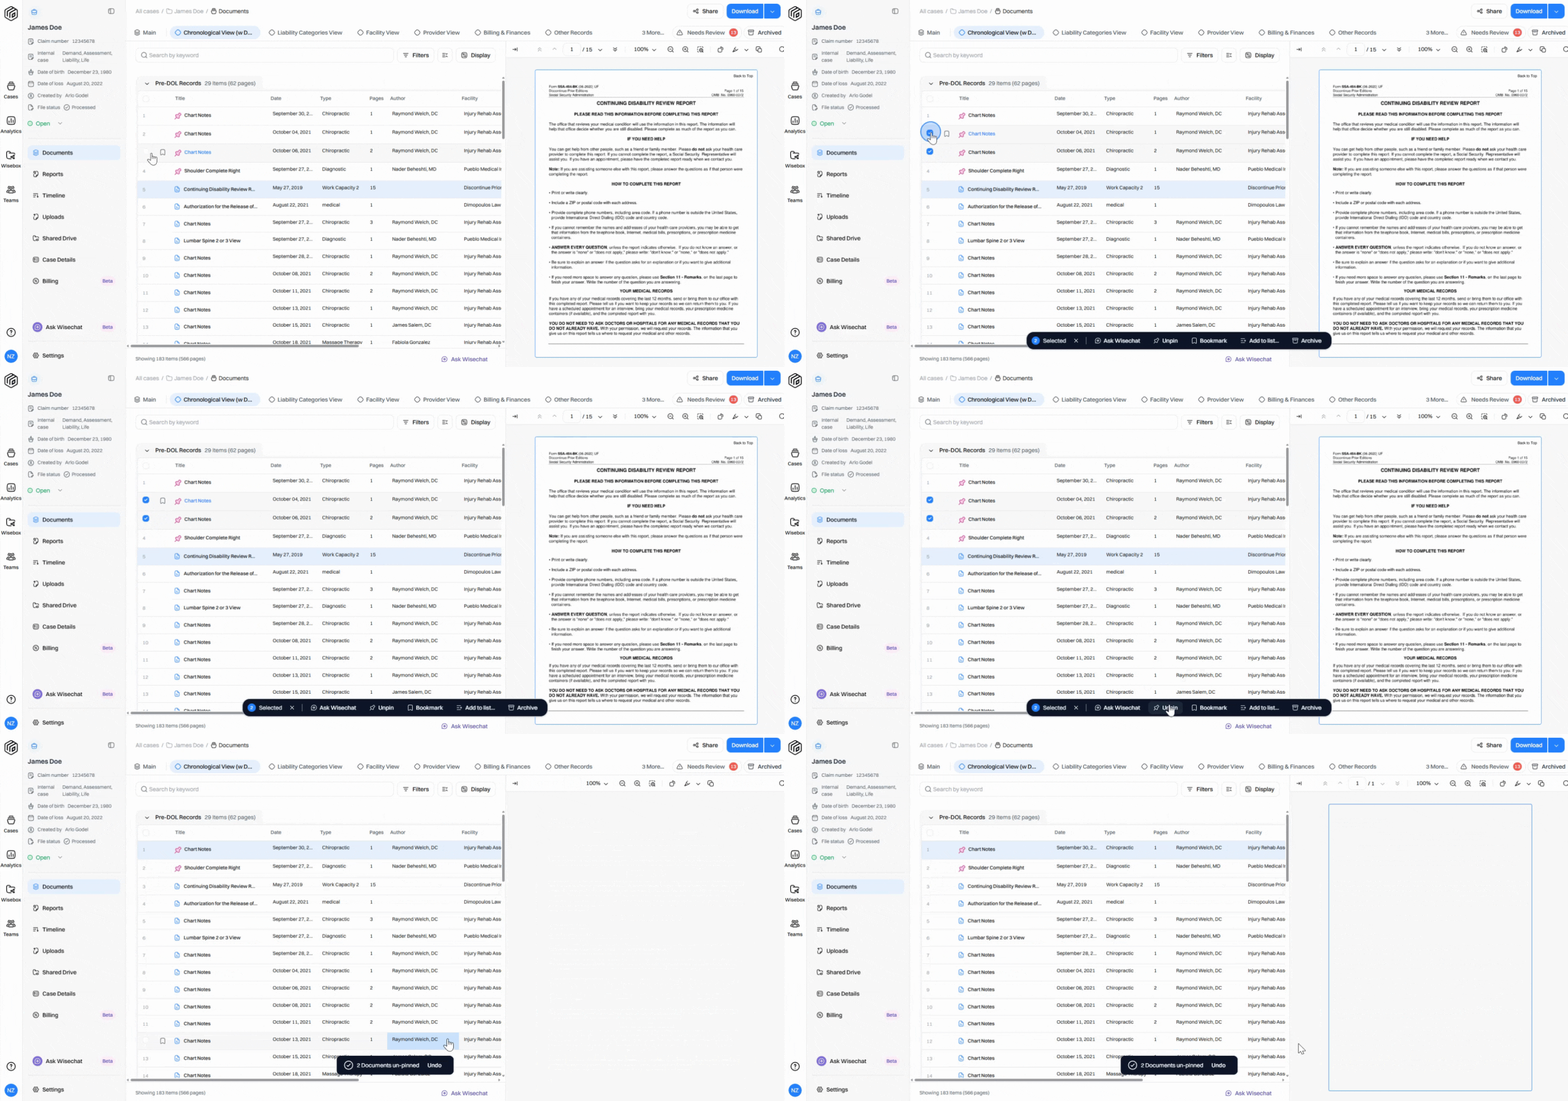
The documents return to their original position within the table.
Please Note:
Pinning only organizes documents within tables in a collection—it doesn’t move them to the top of the whole collection.
Pinning is not available in saved lists, but you can manually reorder documents in saved lists.
Pinning keeps essential documents front and center, streamlining your review process and keeping important information always within reach. Use this feature to stay organized and efficient while working complex claims.