
Fill in case information and upload files on the 'Create a case' page to create a new case.
Creating a new case
- Click on the "Create New Case" button at the top-right corner of the Cases page.

- Fill in the case information.
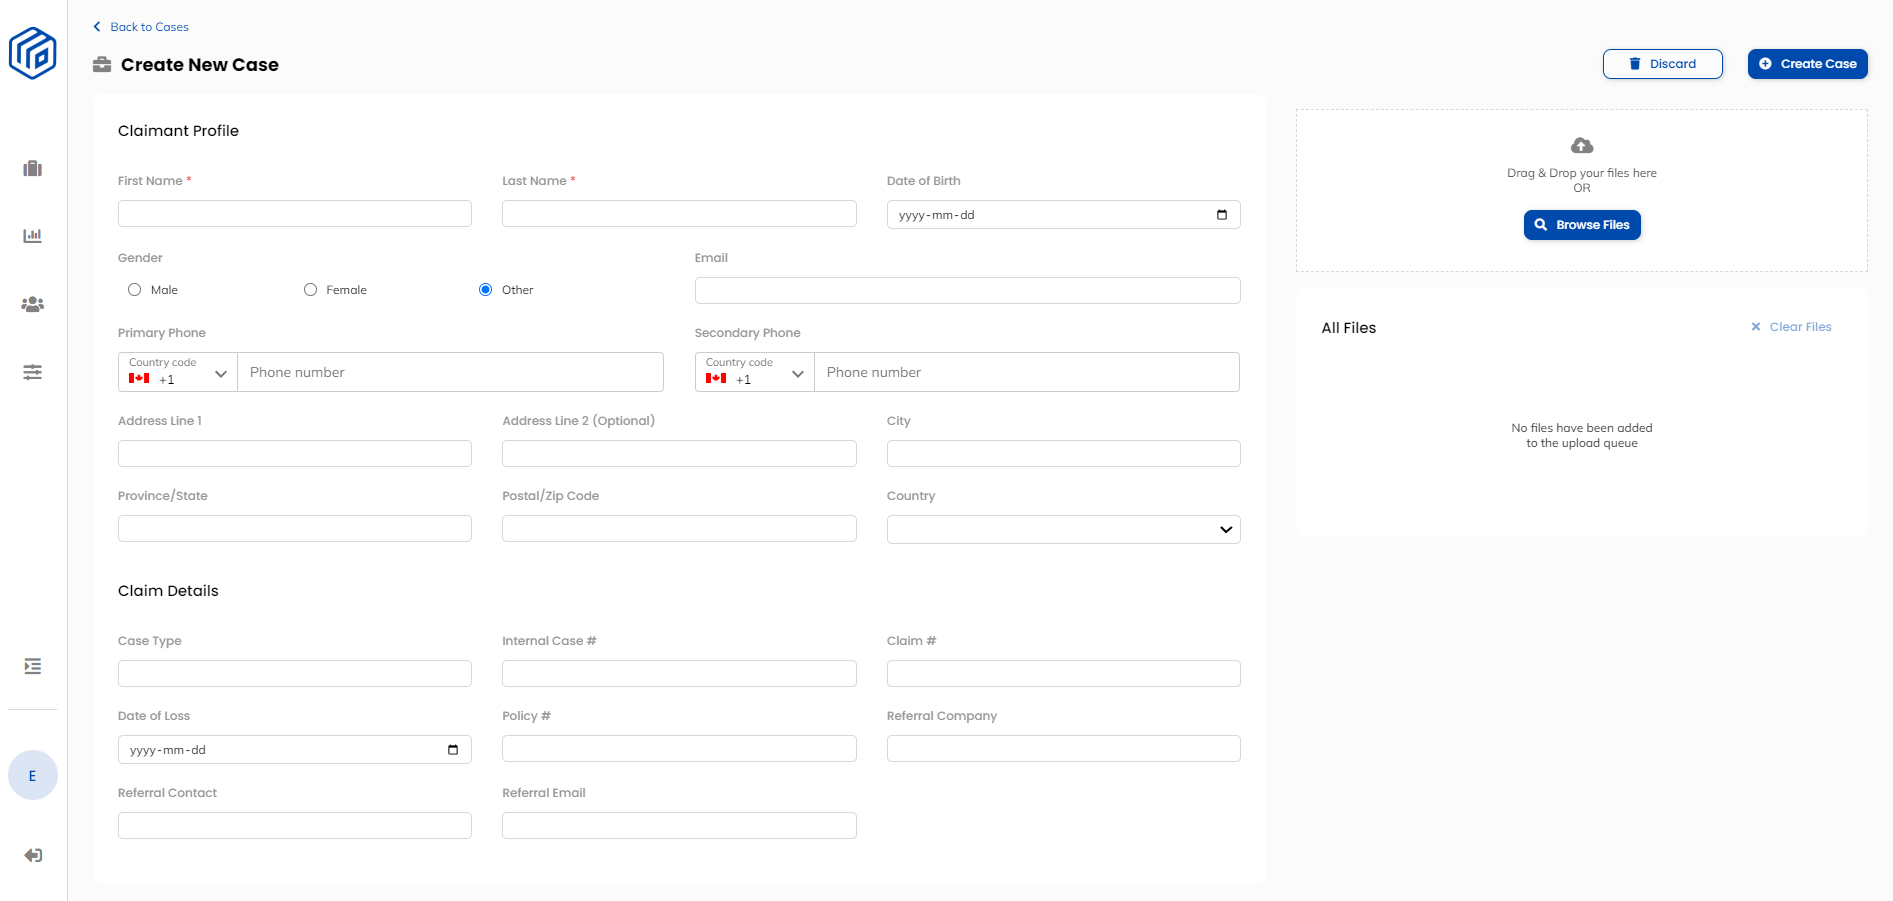
- Required fields:
First Name
Last Name - Recommended fields:
Case Type - This field can be used to categorize cases and communicate any important information about the case to the Wisedocs team.
Internal Case # - This will be the number used to communicate about cases internally. Wisedocs will use this number to detect duplicate cases and communicate about specific cases.
- Required fields:
- Upload PDF files. There are two ways to upload files: you can browse through and select the files that you want to upload, or you can drag and drop files into the blue box. There is no limit to the number of files you can upload at once.

- Once you've added files to the upload queue, you will have the option to add a Review Date. This date will be used as a guideline to prioritize files in the processing pipeline.

- Click "Create Case". Your files will be uploaded. Use the coloured bars as an indicator of the file upload progress.
- Check the status of your files on the Case Overview page.

The colour of the files indicate the status. There are 4 colour status indicators:
Yellow

Processing file
Orange

Validating file
Green

File processed/Doc List ready
Red

Error – please delete & fix before re-upload*
Red files must be deleted in order to view the Doc List for the upload batch.
7. You will get an email once all the files are processed.