
Uploading and Managing Additional Records in Your Case
Keeping your case documents updated and organized is essential for smooth collaboration and efficient case tracking. Let’s walk through how to upload, review, and manage additional records so your whole team stays in sync and no critical files slip through the cracks.
Step 1: Open the case where you want to upload new records.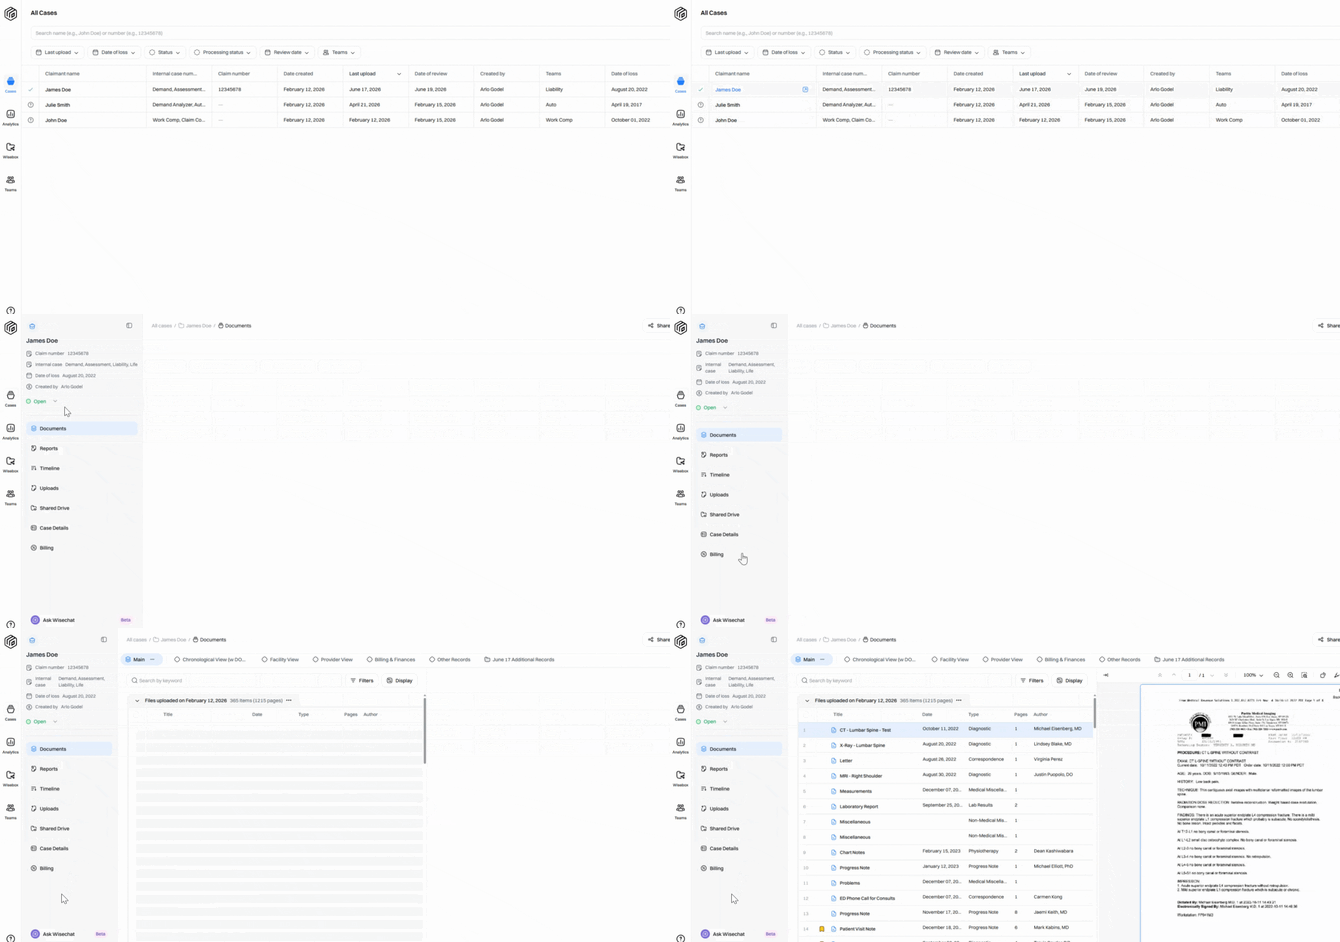
Step 2: Click the Uploads tab in the sidebar.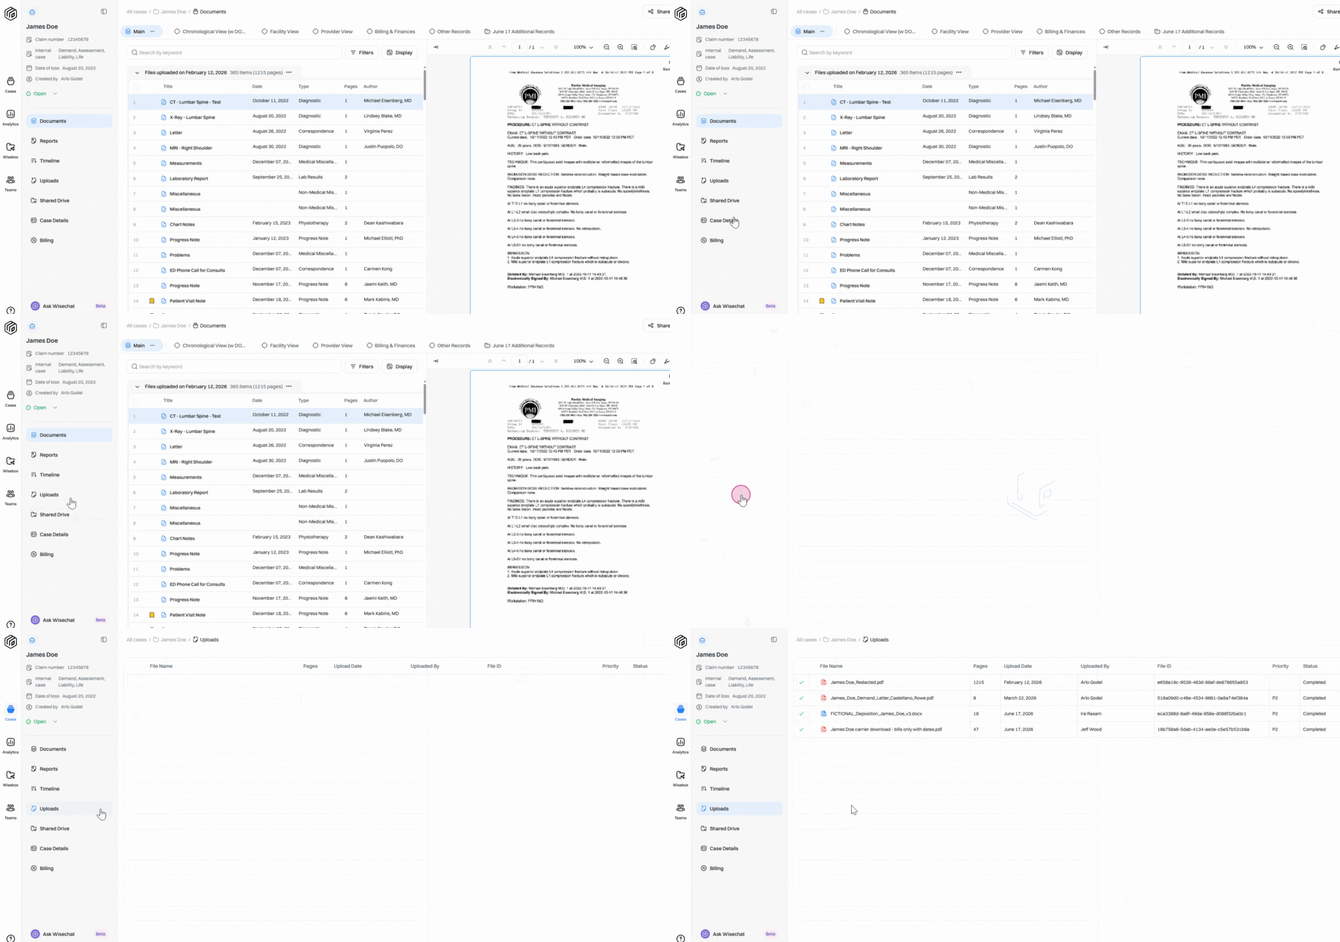
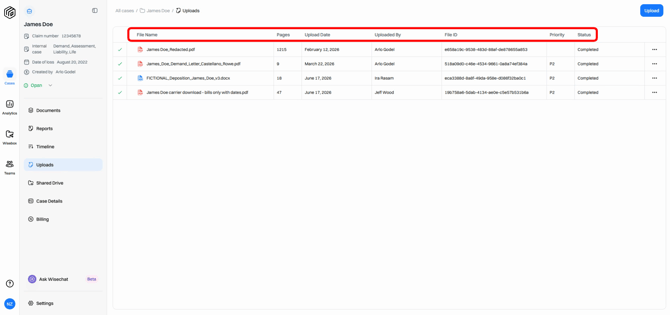
Step 3: Review the current list of uploaded files. Here, you’ll see the file name, page count, upload date, and uploader information.
Step 4: To upload additional records, click the Upload button in the top right corner.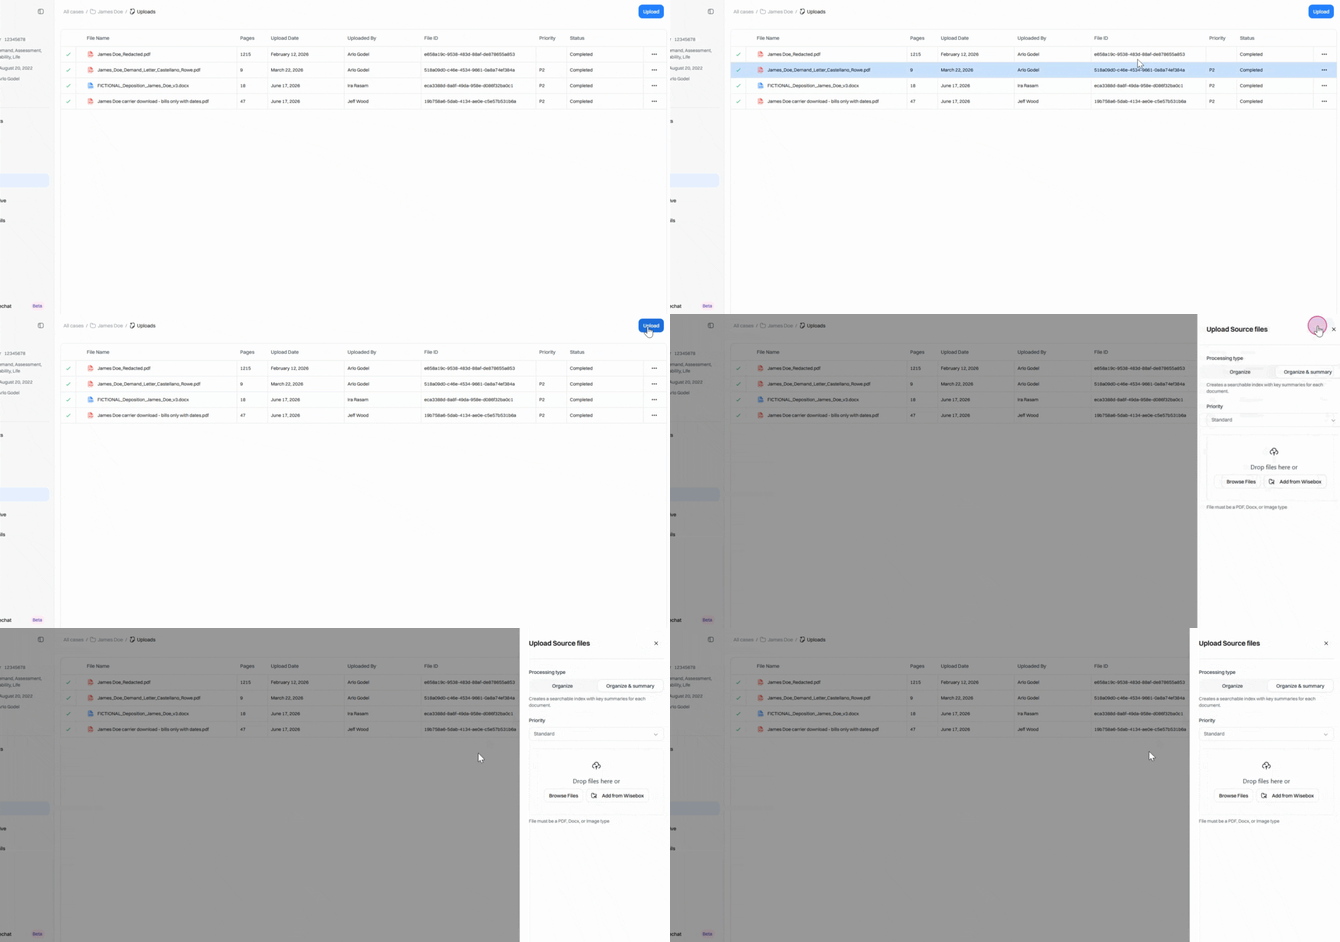
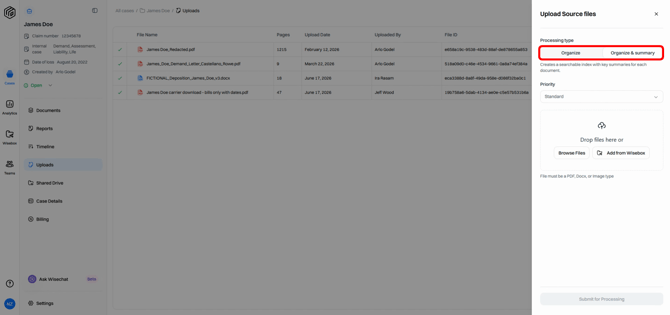
Step 5: Depending on your account setup and the features you have access to, you may be able to select whether that's Organize or Organize & summary. Otherwise, the system will automatically default to the processing type that you are set up with.
Step 6: Set the priority (Low, Standard, or Rush) for your upload, depending on how quickly these records need to be processed.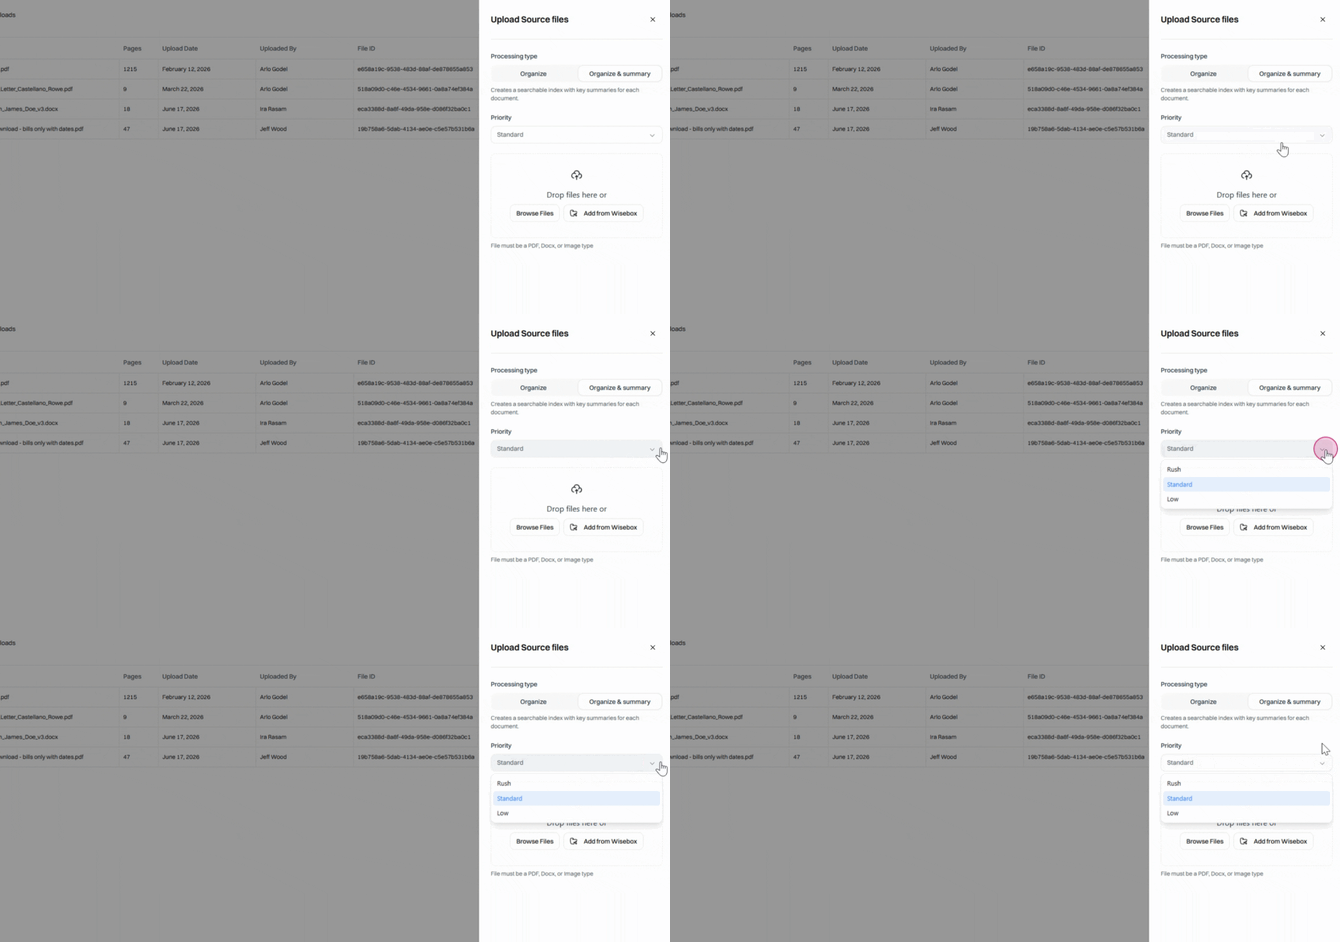
Step 7: Add your files. Drag and drop them into the upload area or click Browse Files to find documents on your computer. You can upload multiple files at once.
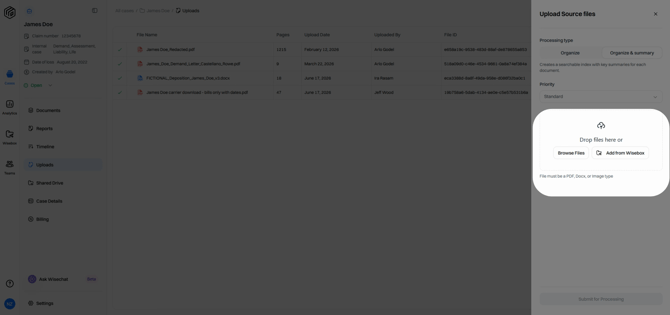
Supported file types: PDFs, Word documents, PNGs, JPEGs, and TIFFs. Folders and ZIP files aren’t supported.
Step 8: Click Submit for Processing after adding all required information. Your files won’t be uploaded unless you hit Submit.
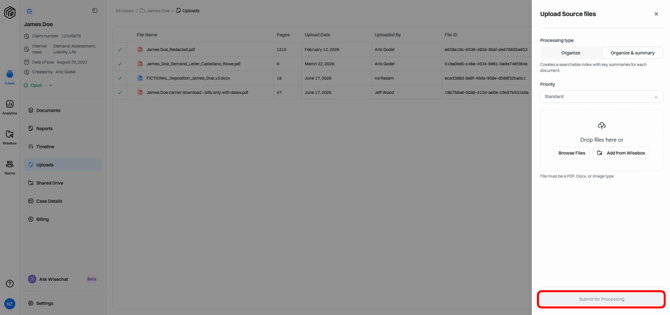
Wait for your files to process. They’ll automatically sync to your active collections.
Step 9: Review additional records in your main collection—they appear grouped by upload batch. Collapse all tables to see the batches clearly.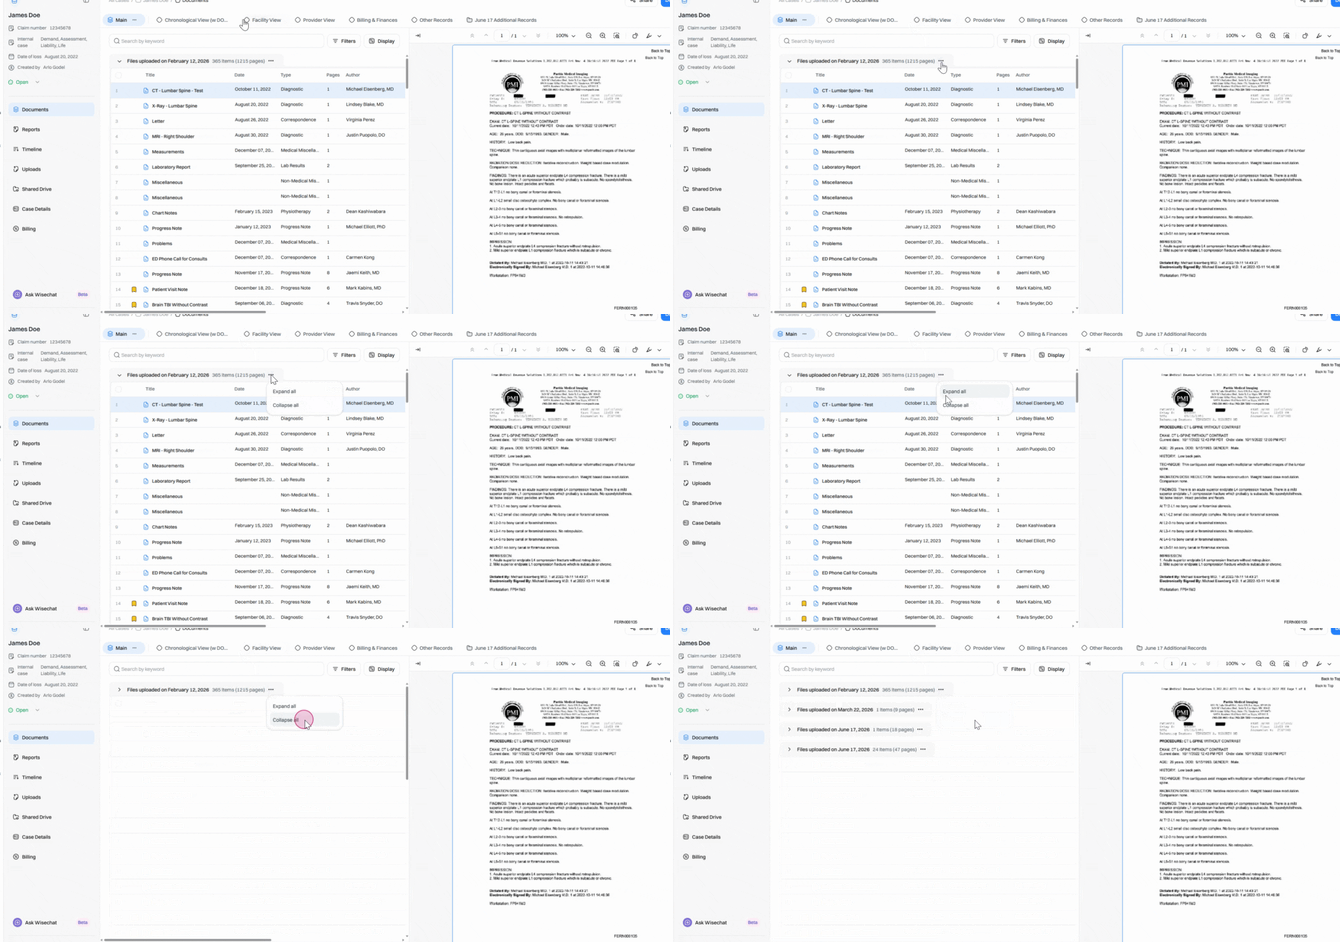
Step 10: Use filters to review records by upload date. Filter by Upload date, pick the date you want, and view the batch.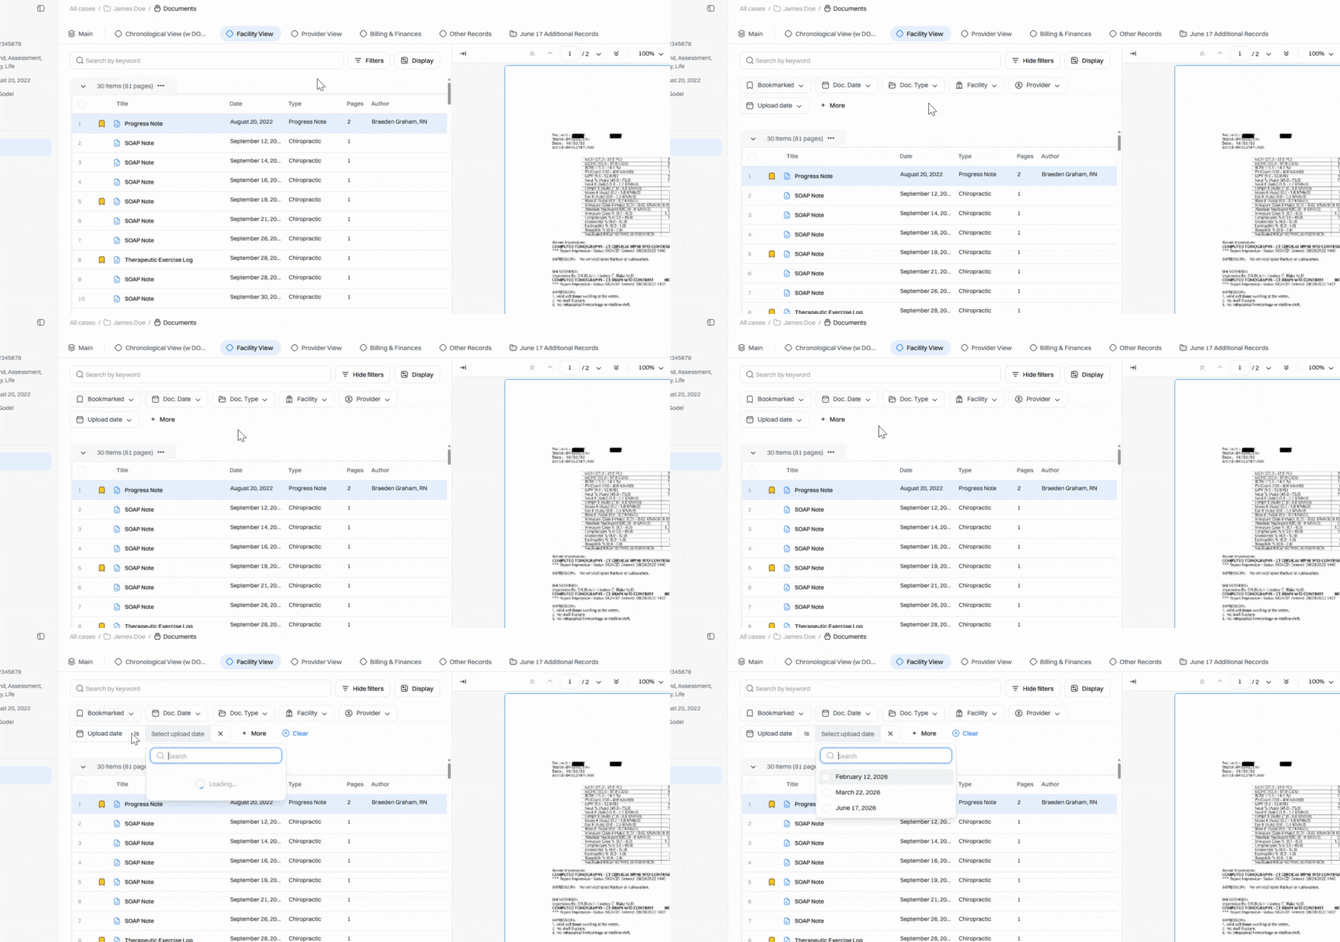
Step 11: Click Clear to remove your filter and return to the complete case view.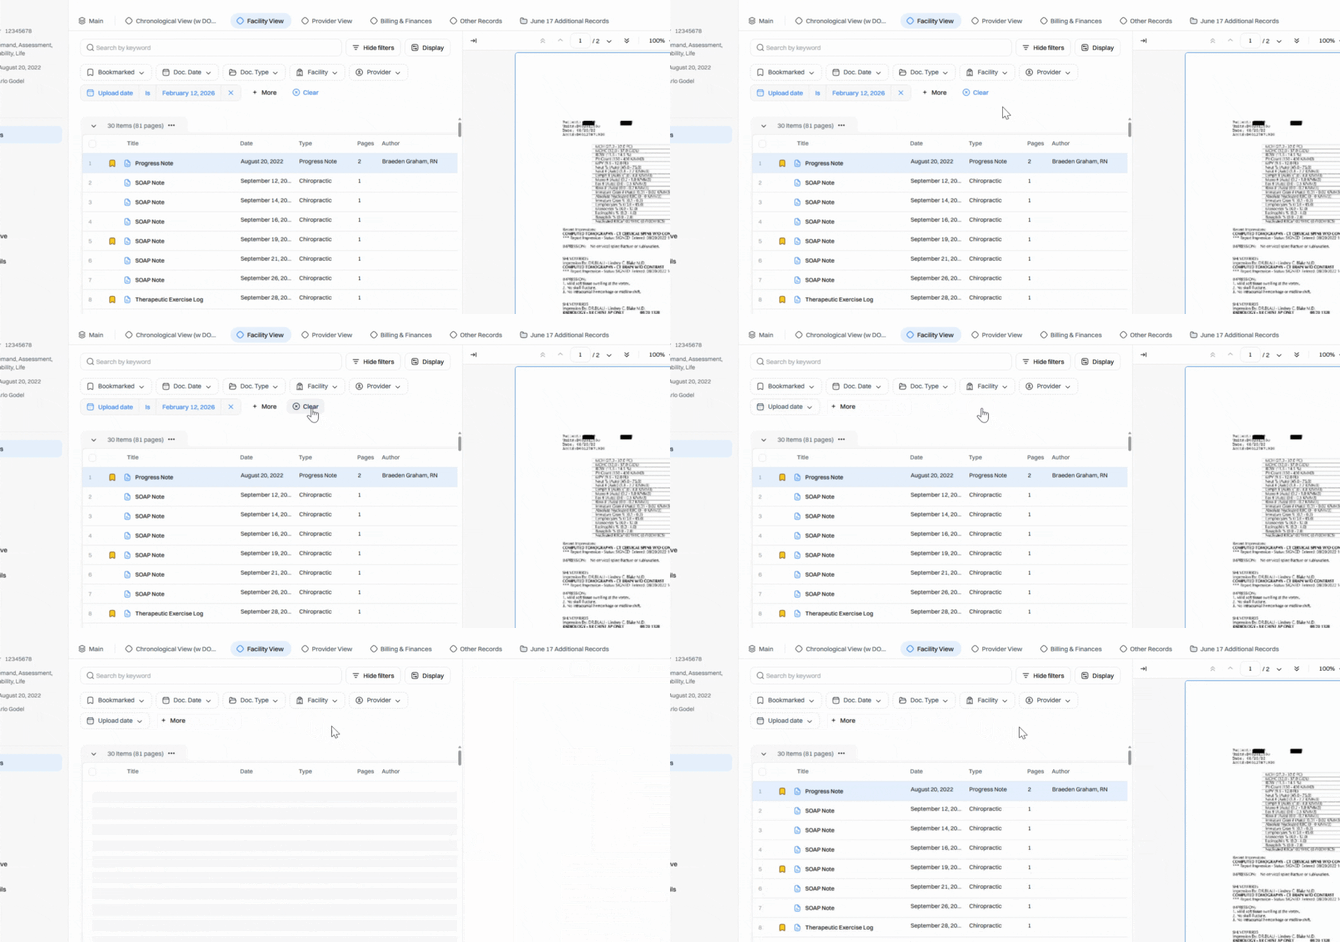
Downloading Your Additional Records
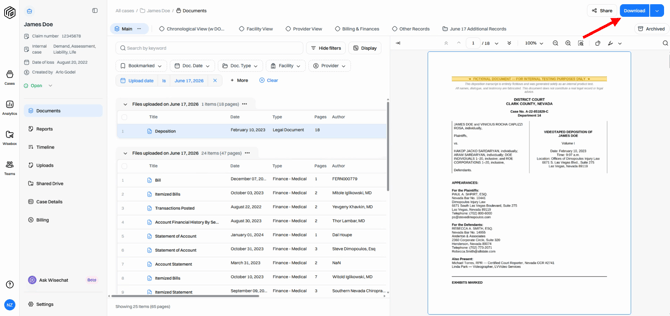
Step 1: To download specific records, filter for the upload date in your chosen collection.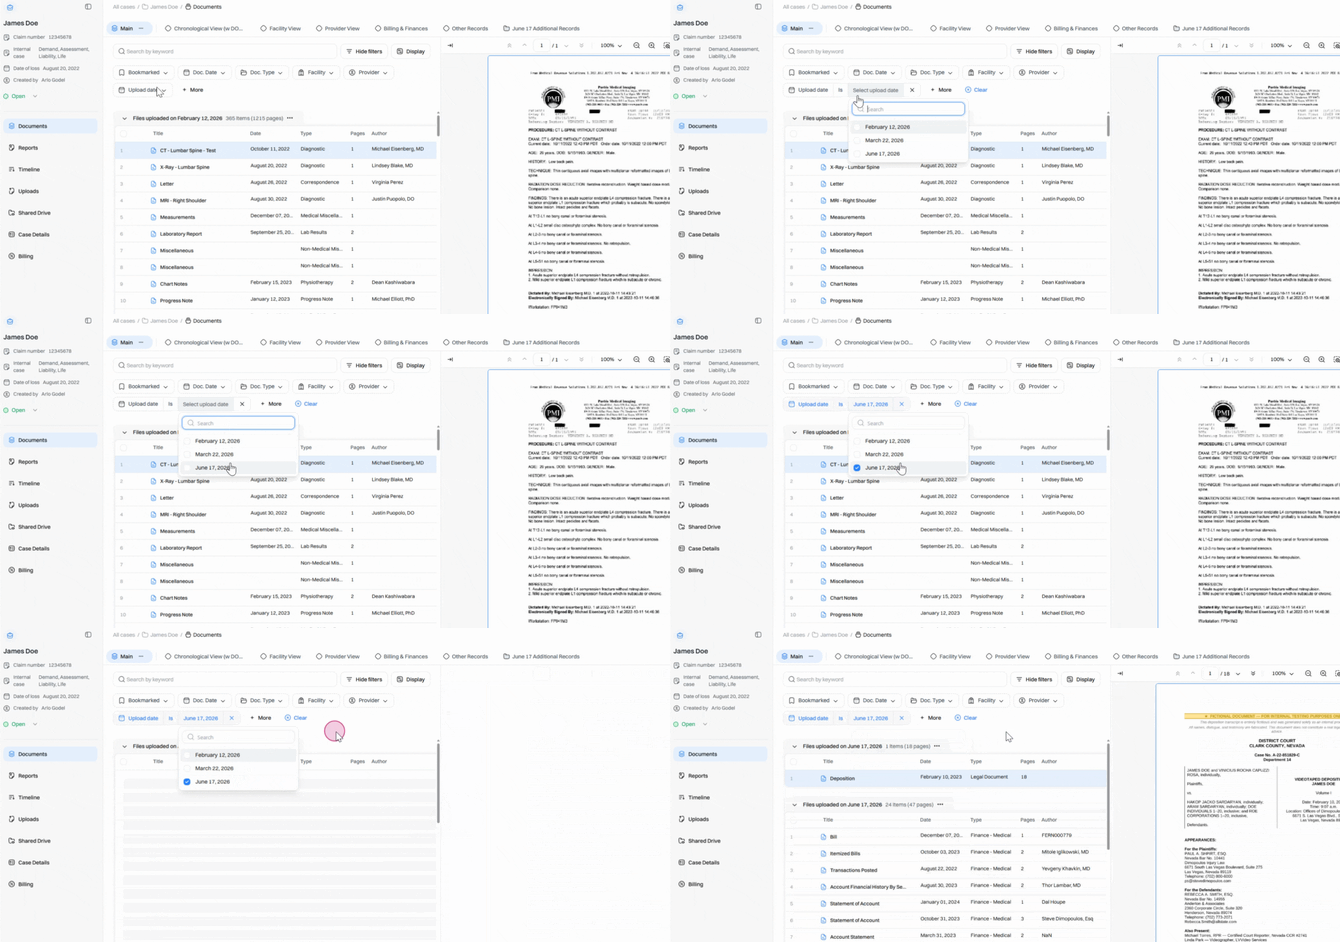
Step 2: Download the list of records. The downloaded file reflects only the current, filtered view.
Step 3: For another approach, create a saved list for the additional records you need. Access your saved list, then download those documents.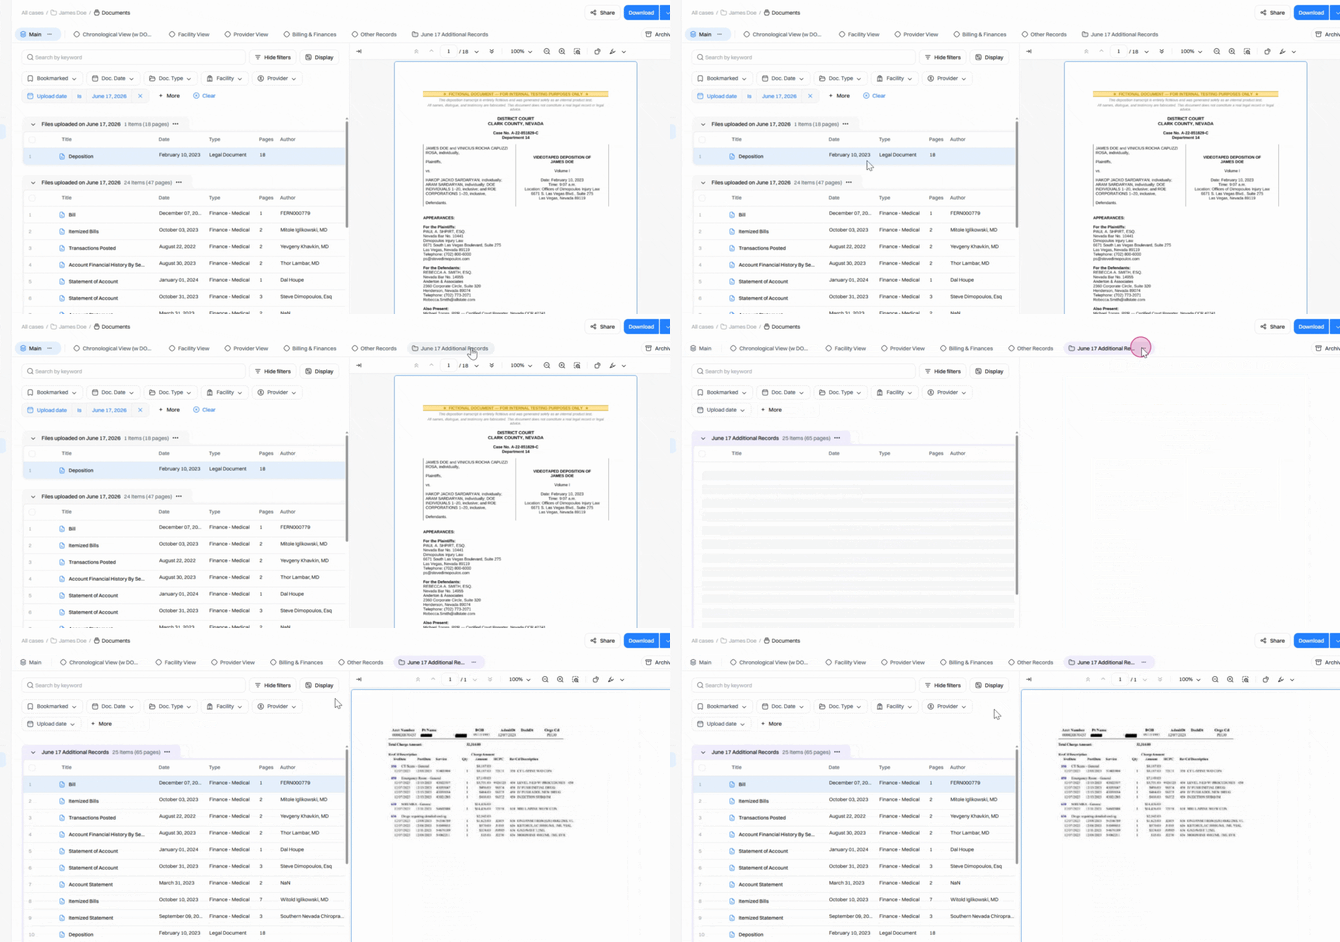
For more on creating saved lists, review the dedicated Saved Lists tutorial.
Uploading and reviewing additional records keeps your cases current and your team fully informed. Stay organized, avoid missing key files, and ensure your casework is always up to date.